Thursday, July 31, 2014

Christmas in July

It's the last day of July and I was feeling like it would be fun to make a Christmas card. Maybe it's the cool temps we've been having. Or maybe it's this cute stamp set and die: Phrase Play #6 from Papertrey Ink. There are sentiments stamps in the set covering a wide range of occasions - two of them being for the holiday season.
I played around with the set as is and then decided it might be interesting to fill that center area with another stamp- an image or a sentiment of some kind. I looked through my stamp sets and came up with Winter Hills. It took a little masking and adding a line here and there but I like the way it turned out. The sentiment is also from Winter Hills.  I used some reinker to color in the sky and highlight the snow. The house was colored with Prismacolor pencils. I used a Cuttlebug embossing folder for the background. Those 3 snowflakes were cut using a Quickutz die I've had for years. I used some Versamark and Holographic embossing powder on them - I think you can see a little bit of the sparkle. And I finished off with some baker's twine.
That's all for me today. Have a good one!

Wednesday, July 30, 2014

Welcome to the world baby girl

You're right - the card says "Welcome to the world little angel" but it tis pink and it tis for the newest baby girl in our family. We're two for two this year - two little girls and I couldn't be more excited. This family is jammed packed with boys - and they are precious as can be - so every once in a while, when God sends us a cute little pink bundle - well it's fun (I mean who doesn't like to buy girly baby clothes?)
This child is a grand niece. My husband's nephew's baby. This is their second - first one was a boy (of course LOL!) and, if she is anything like that sweet little boy - well her parents are blessed.
Okay - details. The die is from Papertrey Ink. I used a Cuttlebug embossing folder on that background (my favorite-est ever - swiss dot). It's a shaker card filled with some clear iridescent sequins (I got from Joann's a million years ago i think). They've got just the right sparkle you know?
Okay on with today's show. The weather here in the burg is absolutely gorgeous - it seems more like end-of-September or early-October rather than the end of July. It's actually cool - unheard of in these here parts and I am lovin every second. Thanks for stopping by and have a wonderful day!

Sunday, July 27, 2014

Sending You Big Hugs

On Friday I'd hoped to join the PTI blog hop but it just didn't happen. I spent the day with my bff, June (hey June!). When I got home I thought I'd give it a try and started stamping all over some cardstock with a stamp from Ruby Reprise. And well, as often happens around here something else needed tending to so I had to put it aside. I fooled around with it a little yesterday - and this morning finally got a minute to finish the card. I used the Phrase Play #6 die and stamps. At the bottom I tied on some ribbon I had and adhered a button but decided I wanted to do something else.  I took out a small round punch, stamped it with a heart and then used my Glossy Accents on top - kinda like a little button cover. The picture doesn't look as cute as it is in real life :-)
Okay - hope you all are having a lovely Sunday! I just took a break from working on my scrapbook of London. Having lots of fun with all my PTI Monthly Moments stuff. Have a good one!

Friday, July 25, 2014

Morning Glory Hello


Got a quick one one for today
I bought the Papertrey Ink Year of Flowers Collection a long time ago but really hadn't used them a whole lot. They recently introduced dies for the set and I couldn't wait to pull out that stamp set. I love a number of the flowers in the set but I think the morning glories are one of my favorites. For this card I used some Papertrey patterned paper, the Monthly Moments: Instant Photo 2 die and some Rustic Creme twine. I colored the image with Copics. The "hello" sentiment is from a new set: Big Ticket Additions. I had to do a little masking (to remove the ticket portion of the stamp) but it only took a few minutes. Despite the floral image I think the card has a bit of a masculine feel (as this card is going to a male member of the family). Ok - gotta run. Hope you have a wonderful day!

Tuesday, July 22, 2014

Make it Monday #173 - No Outline Watercolor

So you may've noticed - I'm not the trendiest girl in town. I am intrigued but it often may take me a bit of time to jump in. It's more of wallet issue with me. I love classic things (at least in my mind what is a classic ok) and I find it easier to put my money down on something I know I'll use for a long time.

Watercolor is classic for sure. And it makes the rounds in the stamping world and it's back again. It really never went out of style right? Nah :-) That being said, I am often reluctant to pull out my watercolors when I've got pencils and markers that can get me there a little quicker. But I decided I had a couple of cards to make and I'd try this week's Make It Monday over on the Papertrey Ink blog. I haven't participated in the MIM for a while.

This is where I segue into the little promise I made to myself. What's that you say? I need to give some of my older stamps some love. You know how it is - you buy new stuff - use it for a bit - then you're on to the next thing. Am I right? C'mon... you know what I'm talking about :-)
Okay so I'm determined to make it a regular habit - I'm makin a new category here on my blog - Everything Old Is New Again. After overhauling all my woodblocks and looking at quite a collection of clear stamps - I need to use them! So... here's my first installment.

These are not my oldest stamps for sure - but they haven't gotten any love in quite a while. I used PTI's Strawberry Patch and Background Basics: Sheet Music. The sentiment is new - Banner Sentiments (and I didn't even use the banner - go fig!)
I pulled out my old watercolor set and some watercolor paper I had and stamped in PTI Fine Linen. I stamped twice figuring I'd just see how it went. Watercoloring and me are not the best of friends. I used to get very frustrated with them. I wish there had been a course in watercolor when I was in school. But it seems these days I've gone from the perfectionist I was (back oh 10 years ago) to a more go-with-the-flow kinda girl. I like her better ;-)

So I colored away with a water pen and really enjoyed myself. I decided the finished card might look nice if I did something with the background. I picked out the sheet music stamps. I pulled out a post it note pad and made myself a mask (not being too fussy about it and stamped that music all over.

On the second card I did go back and edit the mask a little - cutting deeper into the image hoping to get some more of the music stamped there. Then I stamped on the sentiments (one's a little crooked and one's slightly smudged - that Versafine can be a little finicky but its such a gorgeous black yaknow). On one of the cards I decided to try some Rustic Cream twine. And on the other card I went back in with a white Gelly Roll pen and put the seeds back in the strawberries :-)

Overall - I'm pleased. And it was a very relaxing to just paint away and not get too wound up about every little detail.  I may have to pull out the watercolors again real soon.
Have a good one!


Saturday, July 19, 2014

Year of Cards - July

Hi there. I'm busy working on some card sets I intend giving for Christmas gifts to family. When I first saw Dawn McVey's Birthday Classics stamps at PTI I thought this would be a perfect gift for each family. I've been getting one set each month since they debuted in February but I hadn't had the chance to begin making the cards until today. As I mentioned the other day we've got a bunch of birthday's in July to celebrate and I needed one more - then I made 8 more for the gifts.
Here's the one I made for a family member. I'd seen a really cute example from Dawn McVey (scroll way down to see it) where she used a stamp from a flower set to create fireworks on her card. I really loved that idea but didn't have that flower set (although I'd love too LOL!). I'd recently been to a stamp store and when you spend a certain amount you can pick a free stamp from a basket. I looked through the basket and found a Memory Box stamp I thought I might use for backgrounds so it came home with me! And when I started these cards I thought it would be perfect to make the fireworks on my cards. Here you'll see I did the fireworks in 3 different embossing powders (silver, red and holographic). The holographic one doesn't show up that well but it is pretty. When I went to create the July cards for my gifts I decided to eliminate that embossing powder - it makes the cards a little more focused - less is more and all that. But I do like how sparkly it is for this card.
Now on to the cards for the Year of Cards sets.
You may think I'm crazy making all these card sets but I think it'll work out pretty well. I'm making one design basically and changing them up slightly with positioning (of elements) and colors. Not one is alike - and we know how I like to do that: my valentines being the prime example. It's a little challenge for me and it keeps the process from getting boring you know? And once you have the basic design the rest is a piece of cake (and we KNOW how much I love cake!)
These really did come together quickly. I like
embossing a lot as well as the assembly line. I didn't take pics of the envelopes but I did a little stamping on those as well (just some stars).
So July is done. I'm going to backtrack and start making the cards for February through June and then continue on through December as I buy each set. January will need to wait til next year :-)
Hope you're having a great weekend!


Thursday, July 17, 2014

Cool & Sweet


Two cards to share today.
My husband has a large family and there are several during the month of July. And for July birthday cards you kinda think summer-y stuff right? Popsicles are summer-y 
I love PTI's Summer Sweetness stamp set - it has great sentiments and the cutest popsicles (yes... there are not as cute popsicles out there in the stamping world. really. ;-) By nature popsicles are cute - you're right- but in the greater popsicle world - these have the highest cuteness factor).
By the way there will be quiz at the end of this post regarding the number of times I have included the word popsicle.
I cut those cute popsicles out of some glitter paper I purchased at Hobby Lobby (It's Doodlebug!). This card uses the "coolest" sentiment. The second card uses the "sweetest" sentiment. It's a nice little feature of this set - being able to easily swap out those words. (The two lines in black are one stamp - the words "coolest" and "sweetest" are separate stamps)

I used Papertrey Ink's Background Basics: Super Chevron for the backgrounds on the frames (which were cut with the PTI Monthly Moments Instant Photo #1 die). I also used the Herringbone impression plate from Papertrey for the base on the second card. I got my inspiration for both cards from .... darn I can't recall which design team member it was! 
Anyway that's all from me for today. Hope you have a good one (and ... it's 7... the number of times i said that word..;-)_

Tuesday, July 15, 2014

You are My Cup of Tea

Hi there again! Surprised you huh? Yup I'm back again.
Just a quick post today. I really need to finish up some more craft room purging and other things keep gettin in the way. Isn't that life? LOL
Here's a little card I made to brighten someone's day. I think it's quite cheery! All from Papertrey Ink: Background Basics: Super Chevron, Phrase Play #1 Stamp set & die, Tea for Two Additions and teacup die.
(Secretly I would love it to say "cup of coffee" cos that's my go-to hot beverage - but the tea is mighty cute huh?)
I love this Phrase Play series of stamps and dies. They make the quickest & cutest cards and are easy on the wallet too!
Okey dokey... on with today's show. Hope you have a good one!

Monday, July 14, 2014

Reorganizing: Unmounting the Wood Block stamps

So it was about 2 weeks ago I mentioned I've been purging and reorganizing all around the house. It's one of those things you just gotta do now and then. This ongoing project finally brought me to my little craft haven - my art room. OMG - tons to be done in here.
A big problem was the amount of space my stamps take up. A lot of crafty real estate to be sure. I have two large bookcases on one wall of my room and 2-1/2 to 3 of the eight shelves were just Stampin Up stamp sets. There were also 5 acrylic frames (11x14) filled with more stamps from various companies. (I won't even go into the unmounted stamp sets in CD cases and foam block stamps, PTI stamp sets. the list goes on. But hey - I've been stamping for probably 17 years. You accumulate a lot of stamps right?  And I know I have much less than others I know - you know who you are! LOL ).
So I finally decided I could gain back a lot of space if I unmounted all those woodblock stamps I wanted to keep. I finally finished un
mounting and remounting on EZ Mount cling today. YAY!
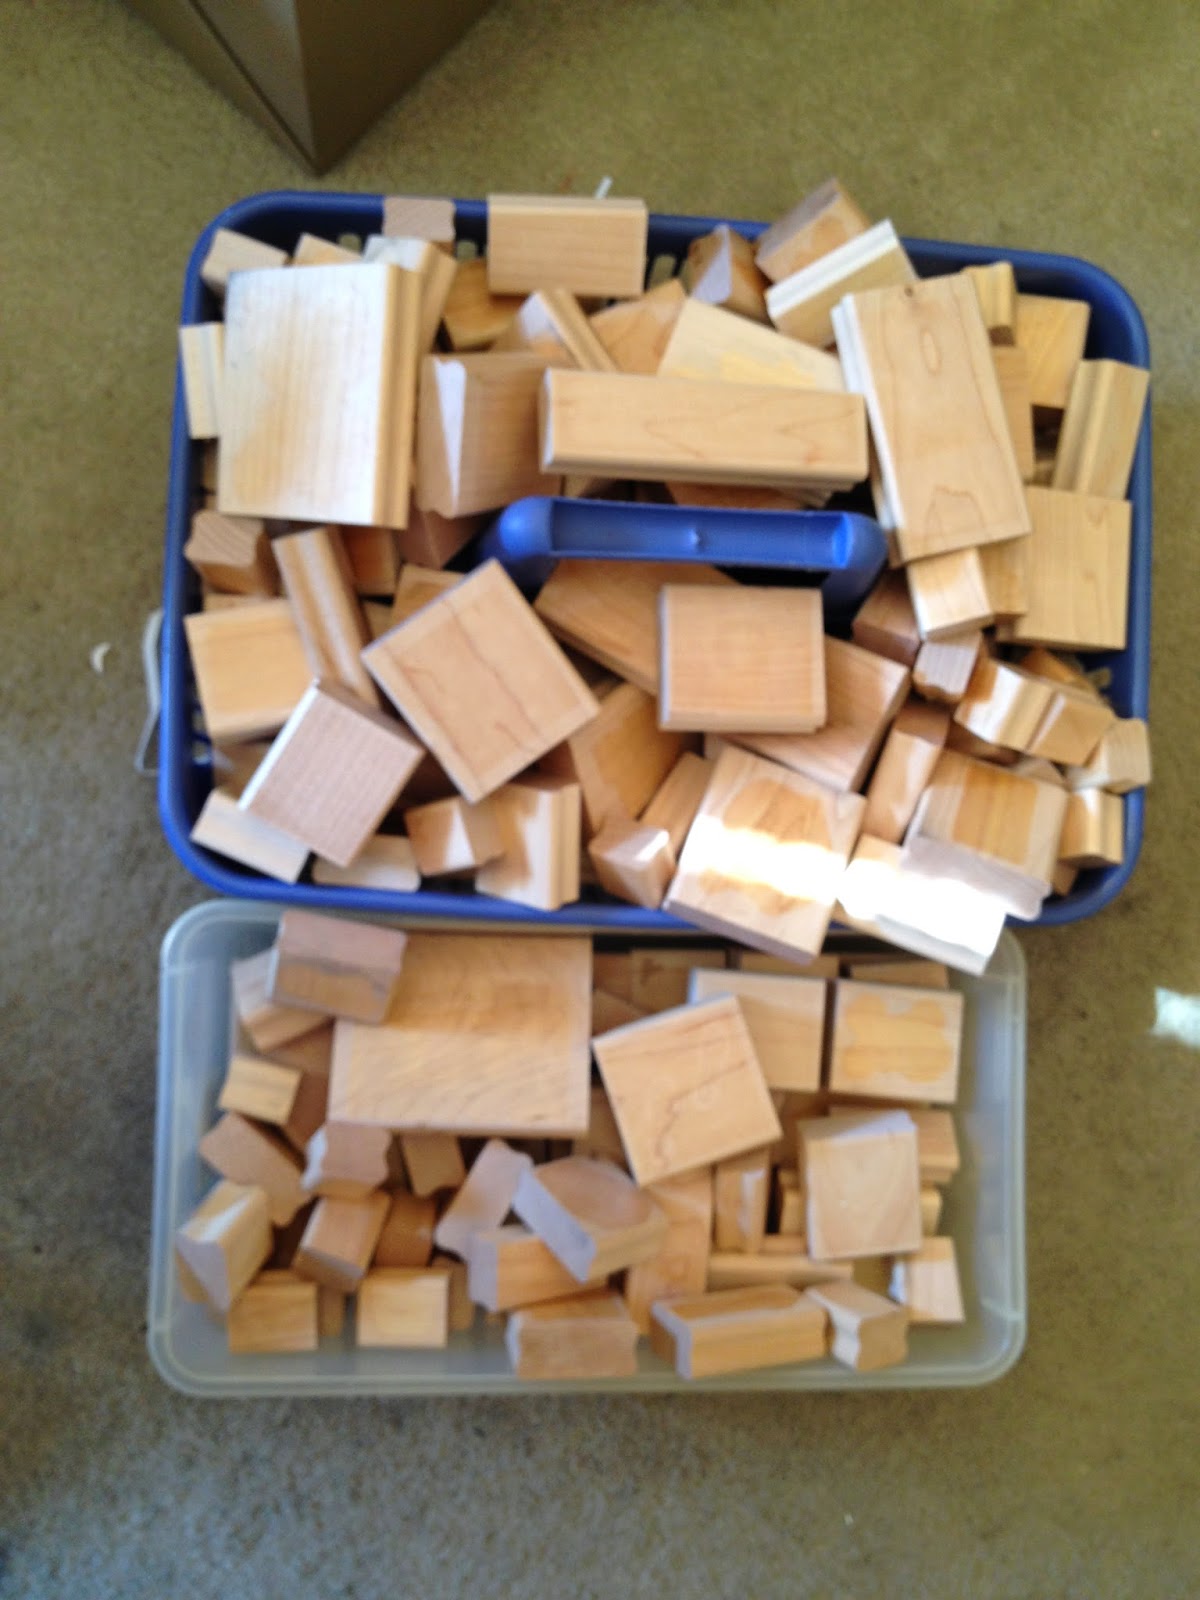
This is just some of the blocks that have made their way to the recycling bin. I didn't take a pic of the ones that I'd already disposed of - which was probably about 3 times this amount.
Here's the last batch I did today. I still need to pull off the labels (if they have them - some of the images are printed right on the wood - can you see the photo boxes behind them - 2 high... it's a lotta wood!)

Before I started this project I looked around online to see if I could glean any tips. I did find a big fat one - via You Tube - that I thought I'd share in case anyone out there wants to do this to their collection.
I would have done what I always do when using EZ Mount. Get out my Kai scissors and go to town. And of course the scissors get sticky and you have to be cleaning them repeatedly during the whole process.
Well there is a much better way to do this girls. It's called a Hot Knife. I got mine on Amazon (I think the company is called Walnut Hollow) but you might also find it at Jo-Ann's. It is a mighty handy tool I'll tell ya. My daughter came through the kitchen when I was cutting with this tool and she said - what's that? Like a hot X-acto knife?  And that is exactly what it's like. I highly recommend it ladies.  Here's one last pic I took while I was cutting. You can see the blade there on the right. The blade turns black from the adhesive being heated but it causes no problems.
So now - what was once occupying almost 3 shelves of my bookcase - now is all contained in several binders - on about 1/3 of 1 shelf. How about that? Incredible.
I do have some remaining woodblocks that I keep in those photo boxes. They're two different categories: Holiday stamps (Christmas, Valentines, St Patricks Day, Halloween) and Background Stamps (mostly StampinUp but one or two others). I'm debating whether or not I'll unmount those. But for right now they're nicely organized in those boxes and it works.
Now onto the final phase of reorganizing my craft room: all things Scrapbooking. This includes 10 photo boxes (full of photos), various containers of loose random photos and memorabilia and a ton of albums I've already made and those in progress. I'm drowning in the stuff and it needs to be better organized so I can get some scrapping done. I've been working on current scrapbooking (like the photos from our recent trip) but I need to get to the old stuff- kwim?
If you have any tips or tricks - please share! In the meantime - have a good one!


Saturday, July 12, 2014

HAPPY Birthday

Well - let's make it four days in a row shall we? LOL

I don't know about you, but I try to take pictures of what I'm making - mostly so I can remember what I made! (I might want to make it again right?)
And as I've been sorta "crafting on the go" taking those pics, before I send a card out the door, really is a must.
So the quality of this pic leaves a little to be desired but I'm posting it.  I cleared an area on my drawing board and you can see some of my practicing with the PTI Background Basics: Venice stamp set in two colors. Ultimately, for this card, I decided I liked the look of  one color. A little less complicated and decidedly more masculine (this card was for the husband).
I also used the PTI Tipped Top Dies - I love that "HAPPY". I cut it a few times/glued it together to get a little more dimension. I wish I could recall which set that "birthday" was from - ah well.
Happy Saturday!

Friday, July 11, 2014

Sorry I'm Late Tag and Ballerina Card

Can you believe it? 3 posts in as many days?
I had mentioned that I've still been making things even though I haven't been posting.
I was talking to my sister earlier today and she mentioned something about a card I'd sent to my niece (her daughter). I went and looked in my photos and sure enough I had taken a pics so I thought I'd share.
I'd made my niece a birthday card (inspired by one made by Nichole Heady) using the Ballerina Beauty stamp set & die from PTI. I'd colored the ballerina to look like my niece (brown hair and dressed in a pink tutu). In the background I'd used a die from Anna Griffin (it is just the most beautiful flourish ever) - I'd glittered up that flourish as this niece is the one who loves all things sparkly! My sister had told me she was going to put the card in a frame to hang in her daughter's room as she'd loved it so much (awww - happy Aunt here).

Now these little packages - were for my niece and my sister. I'd sent them along with the birthday card but they weren't actually birthday presents. Inside were little St. Theresa medals I'd purchased for them in Italy (matching one I'd bought for myself.) St. Theresa is my saint - and my mother's as we share that name. The medals are something we all can wear and think of my mom :-)
Anyway - I made the pillow boxes (using some PTI patterned paper ) on my Silhouette Portrait. The little tags were die cut using the PTI Tag Sale #9 - I love that die.


And the wee little snail? Well it's Tucker from Purple Onion Designs and it is THE cutest thing you ever did see. And Tucker needed to be pink and girly for my niece so I colored him appropriately and added some more glitter.
Too stinkin cute for words! Tucker looks a little more like Tucker-ella, right? Then I tied it all up with a little bit of bakers twine.
Oh and obvi- I just wrote in the "sorry I'm late" - it's a snail... get it?
Ok.... that's all for today.

Thursday, July 10, 2014

Kitty Birthday Card

Finally, I got this card to cooperate and upload. This is the card the kitties made for my husband for his birthday (well.... they had a little help ;-))
We used PTI's Cat's Meow stamp set - sooo cute!
The black cat is a dead ringer for our little Westley - he was colored using Prismacolor pencils. The "yellow" cat is supposed to be our sweet little Willie (short for Wilhelmina dontcha know) - who is a beautiful buff colored kitty. We colored her using Copics.
They decided a birthday banner would be cute on their card and we stamped "DAD" using an alpha set (i believe it's an old Hero Arts set). The "happy birthday" is from PTI's Keep it Simple: Birthday. The patterned paper is also from PTI.  Okay - that's all for today. Have a good one!


Wednesday, July 09, 2014

Hello Birthday Boy

So things are still busy but I thought I'd pop in here real quick and share another birthday card.


I wanted to share another kitty birthday card but perhaps another day when my computer is not making me crazy.

For this card I used the PTI Phrase Play 3 stamps & dies. I also used some PTI Enchanted Evening patterned paper. It's simple but I like it and it was perfect for my son - those masculine cards are tough though, right?
Have a good one!