Showing posts with label Hello cards. Show all posts

Thursday, July 16, 2015

Let's Play: Turning solid stamps into one you can color

Hello friends! Yes I'm back today with something I've been playing with over the past few days but I've been thinking about for a while. Get your favorite beverage and set a spell.....
I love to draw and color. And I've been doing that a lot lately - especially with Kathy Racoosin's 30 Day Coloring Challenges (if you don't know about these - please get yourself on over to Kathy's blog and do a search pronto!). And it's been so much fun. While the challenge was going on - and I wasn't drawing something to color or using some stamps to color - I discovered something. I have a LOT of stamps I cannot color. The horror! I have a lot of stamps and the vast majority are solid image stamps. Meaning there are no lines - you stamp a solid color. Now of course some of them are 2 step stamping sets that add wonderful dimension but, in short, there are no lines. I thought I wish I could use some of these stamps in the challenge.... but how? They aren't the kind of stamps you can color in with markers, pencils, or watercolors. Then I had an idea. I'm sure someone else has had this idea but I haven't seen it anywhere. It's actually kind of the opposite of the "no-line coloring" that's so popular now - except you're putting in lines. Follow me....
So here's an image from Avery Elle's Petals & Stems on the left. On the right - same stamp!
The flower on the left is stamped as is with a dye ink. The flower on the right - stamped as is with Tim Holtz Distress Ink, inked (basically tracing the image) with a Copic friendly pen then colored with Copic Markers.
Crazy right? Completely different look and all from the same stamp!
Okay you want to see another???
This time it's one of my favorite stamp sets - Papertrey Ink's Cutting Garden It's just got the prettiest flowers and leaves! It's a bit more elaborate than the stamp above so let's see what happens with that shall we?
Here I stamped using the set as is - a couple of different inks and a little masking to put the small flowers and leaves behind the larger image but pretty straightforward stamping. (The sentiment is also PTI - Graceful Greetings for the record). You'll note there are white lines indicating the petals - but that's where the stamp didn't stamp if you follow me - the negative. No lines.....
Okay now let's see what it looks like when I want to make it a stamp I can color in with Copics!


Pretty cool huh? It looks completely different doesn't it? Again, I stamped with a Distress Ink (Fine Linen), then used a Copic Friendly pen to trace the petals and colored it with Copic markers.  Just for the record my Copic friendly pen for this isn't a Copic - it's a pen I draw with - it's a Pilot G-Tec-C4. Love that pen. But I've used it a ton and it works perfectly well with Copics.
Okay - are you curious about what would happen if you wanted to watercolor using this technique? I'm so glad - I tried that too!


And here's what it looks like colored in Zig Clean Color Markers and embossed with white embossing powder. Kinda pretty. I had to do this a little differently - using a Zig Embossing Pen - which I don't think are available anymore. It's basically the same as a Versamark pen (I couldn't find mine). You draw with the embossing pen over those lines in the stamp then add embossing powder, heat with your heat gun and go ahead and color. I did try with clear embossing powder - it works nicely. I'm not showing a sample here because again I had to use the Embossing pen - and that ink has a blue tint to it - and that blue tint stays trapped under the clear and you get pale blue lines - here with the white embossing powder you see none of that.

Just so you can see what it all looks like before I added color to the images here's a few pics I took while I was trying all of this out.

When I started with this I pulled out a few stamp sets. This rose is from Papertrey Ink's Rosie Posey. I stamped the rose in Fine Linen Distress Ink and then added the pen. I'll don't have a pic of the colored rose. I was going to watercolor this rose - stamped it - then inked with my Pilot pen - should've used my Pitt Pen which is waterproof - so you know how that went. I had the black ink running - ugh. I shall have to go back and try the rose with the Pitt Pen in watercolor because I think it would be pretty beautiful.
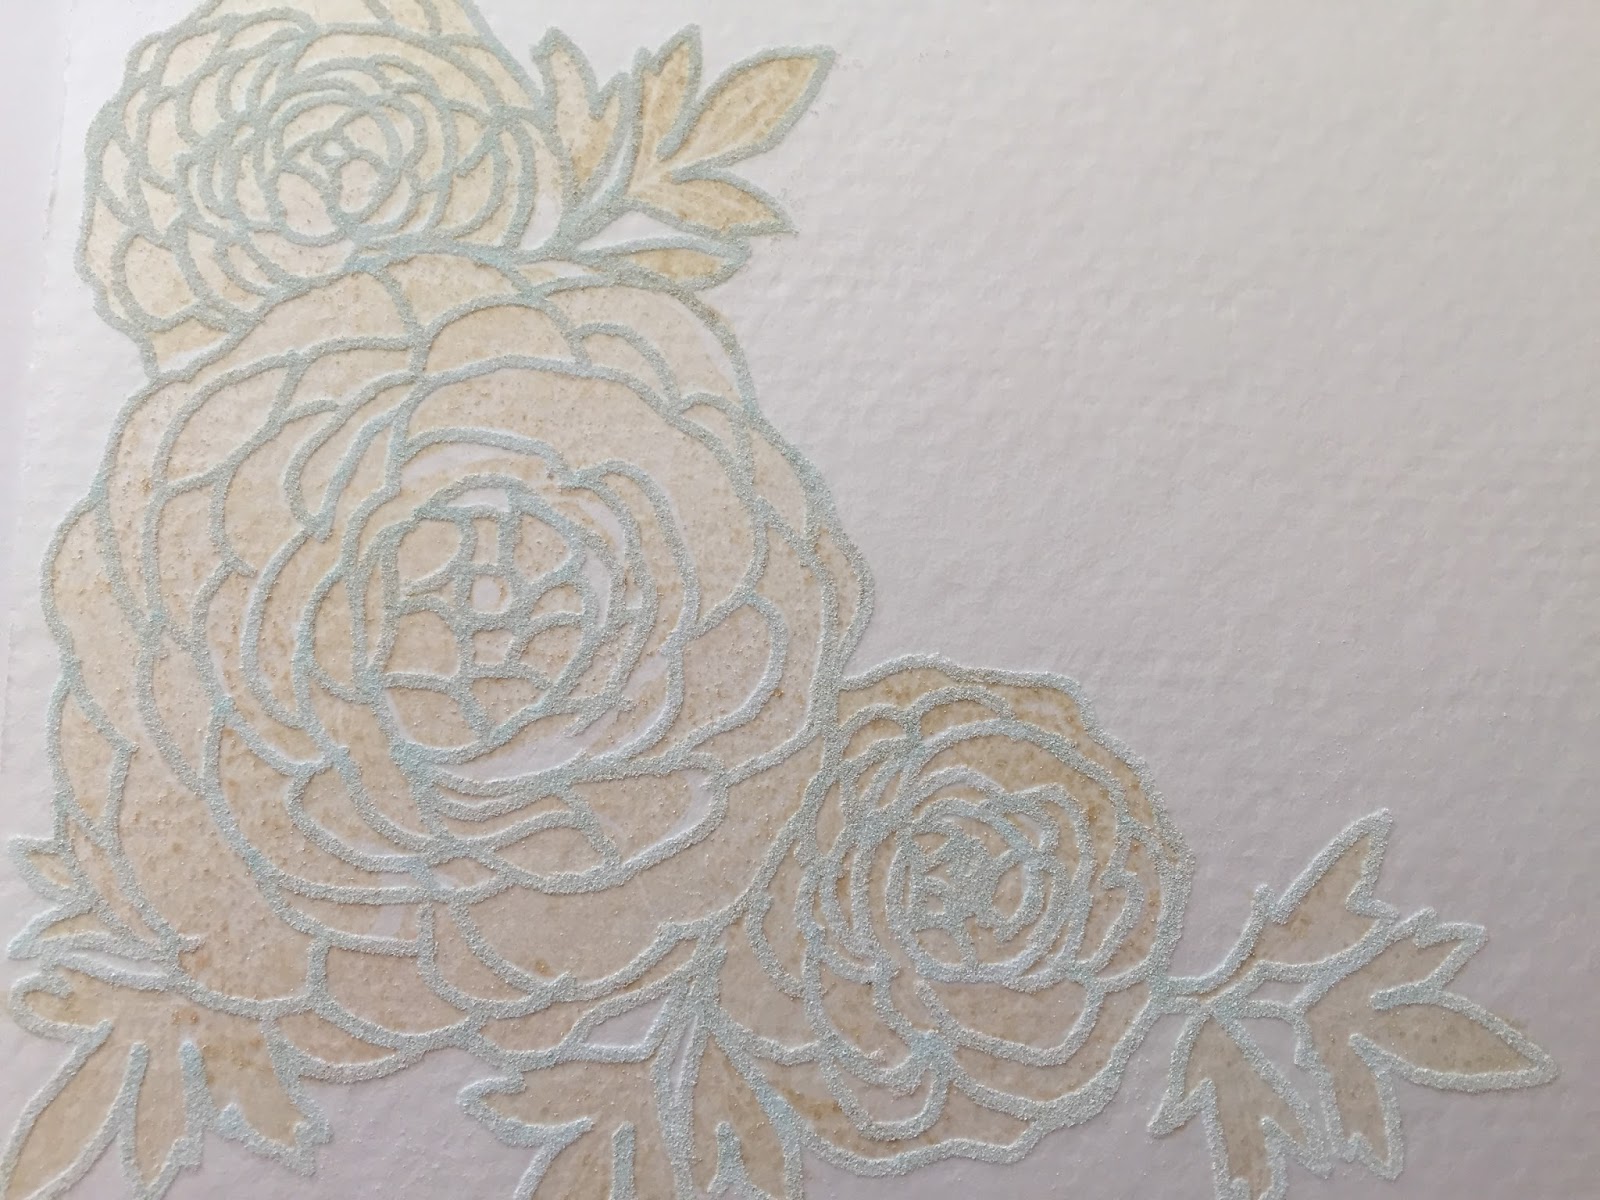


 I hope you can see this. This is before I heat embossed the image and added color. You're seeing the distress ink and the embossing powder there. When you color it in the Distress ink really isn't an issue


And here's the image stamped in Fine Linen Distress Ink, then inked in pen before I colored with Copics. I think besides coloring with Copics I loved this part the best. You really don't have to be someone who draws on a regular basis. You are just pretty much tracing what's there. And you can edit if you like. Say you want fewer petals ... you just draw in the ones you want! I was a little concerned having that much Distress ink in contact with my Copics. I happen to have a duplicate of one Ciao marker - so I tried with that first - thinking if it got ruined I always had the other pen. I swear it did not damage my pen.
So what do you think? I think I can now get a lot more life out of the stamps sets I own - and that's an amazing thing! And when I purchase solid stamp sets in the future I've got another technique in my arsenal to color them any way I'd like. Yay!
Okay that's quite enough for today right? I'll close saying that Kathy Racoosin is hosting another Coloring Challenge in either September or October - and if you love to color - you need to join in the fun! And please come over to Instagram, if you haven't already, follow me there - say hi okay? I really would love to know what you thought about today's post - can you comment below please? Thanks so much for stopping by!


Wednesday, July 15, 2015

Cat card

Hello friends! 
Not feeling creative in the post-titling department apparently right? LOL
Just wanted to share a card I made yesterday. I got off schedule with my "Dear Ones" cards. Too much stuff going on and being away at the beach threw me off schedule. And I really wanted to send my husband's Aunt a card. She's also a cat lover. 
I'm sort of in love with this line of stamps from Stampendous - called Pen Pattern. Everything looks like a doodle sorta. And you know I like a good doodle :-) I found these 2 stamps - the background is called Pen Pattern Light and the cat stamp is aptly named Pen Pattern cat :-). I thought that cat looked so sweet and cozy - like my Westley (or my girl cat Willlie for that matter) - all snuggled up on a rug. So the colors are inspired by the rug we have in our family room. It's all grey, cream and red. I colored the cat, fussy cut him out and mounted it with some foam tape onto the colored background. I'm not going to lie - the background took a while to color - more of the decisions of what color where kind of thing. But I love the coloring - it really was so relaxing and enjoyable. And for this Aunt - I'd color all day long the most intricate pattern there ever was -she's just so dear to me. 
That's it for today kids. I am working on a few cards with an interesting twist I think. I'm just playing around with them a bit before posting and hoping for tomorrow. It's all about getting more from the stamps I already have - and can't we all use that? Yeah I think so. Have a good day!


Wednesday, May 27, 2015

Hello Sunshine

Hello Friends! Hope you all enjoyed the holiday weekend. It was quiet around here - good for getting some things accomplished. I told you I've been purging and reorganizing The never ending project it seems. I'm trying to think of it more as steady progress toward a final solution to this room! Anyhow my husband and I took a little drive to Ikea and purchased a shelving unit. He put it together and my daughter helped me move it into my room yesterday. I'm kind of thrilled with it. It's close to waist-high and perfectly fits my printer and big shot  (and some baskets of dies) on top and can house my Silhouette portrait, more dies, Xyron, AG Minc,  label maker, embossing folders, Project Life stuff and a little bit more. I'm still rearranging things or I'd throw in a picture. Maybe soon.
Where's the card Tracy? You knew there was one right? I had started making some cards using Papertrey Ink's Bowl of Sunshine last week when I got together with my friends June and Amy (hi girls!). I'd intended to make these my "June Dear Ones" cards - and I may still. But I wanted  to send a card to an old friend  (we'd met last week for lunch when she was passing through the 'burg.) So I decided to use one of the cards in progress. I'd already embossed the front of the card with a StampinUp! embossing folder (using a Tim HOltz diffuser plate to create that main section that's plain). I just needed to add the image that I already die cut and stamped as well as stamp the sentiment. The sentiment is from the Hello Sunshine set - also PTI). Pretty quick and easy and I like the color combo a lot. 
Okay that's all from me today - thanks so much for stopping by!

Monday, May 18, 2015

Dear Ones cards for May

Hi there friends! It's time for more "Dear Ones" cards. This month I was determined to use a set from Papertrey Ink called Topiary Trio. I had to have it months ago and yet I still hadn't used it! This is a rarity for me - when I buy - I use LOL. But for some reason this set, which I adore, kept getting pushed to the back of my stamp bin. Anyhow, I played around with the stamps and finally decided to use just one of the little topiaries (and one pretty sentiment). I used the dies to cut out the image on white cardstock as I'd decided to stamp the stem/trunk and the container and use colored cardstock for the round leafy ball (what do you call that anyway?? - i think you know what I'm talkin about!) I used my Misti to do all the stamping - and I gotta say again here that Misti was one of the best tool purchases I've ever made. Not only did I crank out the stamping parts of these cards in no time flat - i was actually talking to my friend June (HI JUNE!) while I was stamping - something I normally cannot do. I gotta be concentrating ya know what i mean? But that Misti took all of the work (and concentrating) out of the mix and I could just chat, drink coffee, and stamp. I used the Lil Inker stitched rectangles again and the patterned paper is all from the Fine Linen Pattern Pack from Papertrey Ink. Pretty simple cards but I think they look rather elegant! And perfect for the recipients. That's all for today kids! Thanks so much for stopping by.

Thursday, February 26, 2015

Why, hello there....

and how are you on this fine day? Well, here in the burg it is snowy. We had a few inches and I just came in from shoveling the slushy mess and decided I'd post this little card I made.
When I was watercoloring up a storm the other day for the PTI blog hop I tried one page of smooshing (that funny word again) a background for this little guy - Tucker, the snail from Purple Onion Designs . I just love this little guy. I defy anyone to look at him and not get a little grin on their face. I stamped him separately on a scrap of watercolor paper, colored him in and when he was dry I added a Wink Of Stella then cut him out with scissors and placed him on this card. I added that sentiment (from a PTI  Anniversary set that is no longer available). Then mounted the whole thing on a card. Quick and easy and I think pretty darned cute. Okay. That's all for today friends. Thanks so much for stopping by.

Wednesday, February 25, 2015

Papertrey Ink Blog Hop Challenge

Hi Friends! It's been a couple of days but I was determined I was going to post today for PTI's blog hop challenge. The inspiration photo was so beautiful and I've been mulling what I'd do over in my mind for a while. I know we're only allowed to enter the challenge with one card but I've made two so I'm posting them both.
 I knew I wanted to play around with a watercolor look and one of my PTI cover plates. I finally decided on the hexagon cover plate. I tried my hand at "smooshing" with a range of PTI reinkers on watercolor paper (PTI colors: Aqua Mist, Spring Rain, Spring Moss, Sweet Blush, Harvest Gold, Fine Linen; Tim Holtz Distress Inks: Antique Linen and Faded Jeans). It was a lot of fun and when I was done I had lots of watercolor-like sheets of paper - it looked like Easter all over my drawing table.
Then I ran each one through my Big Shot (the watercolor paper is nice and thick and while the pieces were all cut none of them moved til I pushed them out with my fingers which was very handy!) Then I started arranging them in what i thought was a pleasing mix. You'll note I didn't use the framework from the coverplate die - I just pieced it all together. I know it sounds crazy but it wasn't a lot of work. And the sans-framework was the look I was going for.  I finished off the blue/green card by cutting around the finished piece and mounting it on an Aqua Mist base. (The color isn't showing up as beautiful as it is in real life - I just couldn't get a better photo this morning.) I added the piece of vellum that I stamped in Versamark and embossed with white Filigree Embossing powder (Sentiment from Think Big Favorites #22). I used some pinking shears to cut off the ends of the vellum.
For the pink/green card, I trimmed the watercolor base and mounted it on Sweet Blush cardstock. The sentiment, stamped in Smokey Shadow, is from Bundle of Love.
I'm so happy I got to play this blog hop. It's been a while! Now I'm off to get some chores done so I can look at everyone else's entries this afternoon! Thanks for stopping by!

Wednesday, January 28, 2015

Dear Ones cards for January/Year of Thinking of You August

Hi friends! Here's a Dear Ones card I made for this month. (Dear Ones cards are those I send to special friends/family members who I rarely get to see - they live so far away - and they're all seniors - some get out - some don't - but they all appreciate a handmade card and a little note to let them know I'm thinking of them.) I made 8 of these cards very quickly.
I used Papertrey Ink stamps (Flower Fusion #'s 4 & 7), the Linen & Canvas Impression Plate, the die from Wonderful Words: Hello and those stitched rectangles from Lil' Inker.
It's been cold and snowy here in the 'berg and I am trying to think "Spring" - hence the color palette.
That's all for today kids - stay warm where you are!
I'm editing to add that my sister-in-law liked this card so she'll be using it for the "Year of Thinking of You" cards - August edition.

Wednesday, October 15, 2014

More Fall Y'all 2 (Happy Autumn)

Back again with my Happy Autumn card.
I used my Silhouette Portrait to cut out the main image and the rest of the card is papers from Doodlebug Friendly Forest Collection along with the Mini Doodle Pop cardstock leaf sticker.
And a little twine.
And my sewing machine.
I used to sew on my cards all the time and I'd gotten out of the habit. I really love the look of stitching on paper. I started stitching on paper probably 15 years ago. At the time I was sure I'd wreck my sewing machine but I didn't - well not right away at least. I think this is my 3rd machine. As much as I'd love one of those fabulous computerized ones I don't sew quite as much as I used to. Back in the day I was sewing drapes and Halloween costumes - various and sundry things. But these days I pull it out for cards and the occasional project that I gotta make (I have a few that are coming up - stay tuned!)
Okay - that's all for today kids. Thanks for stopping by!

Tuesday, October 14, 2014

More Fall y'all

Hey there. I just wanted to show a few more "fall" cards using that Doodlebug Friendly Forest patterned paper and some Mini Doodle Pop cardstock stickers.

On this first card I used the Nuts for You stamp set from Papertrey Ink again. I've had a lot of fun coloring these little squirrels! I cut out the "hello Autumn" using my Silhouette Portrait. And then there is of course these adorable Doodlebug papers and that cute little leaf sticker. Oh and the rick rack border was cut using a die from PTI.
Since Blogger is being uncooperative at the moment I think I'll do the other card in a separate post!


Sunday, October 12, 2014

It's Fall Y'all

I don't know if I've mentioned over the years - probably have - that I was born and raised in New York and New Jersey. The beginning of my migration south started in college. I went to school in Maryland. At the time my family
thought I was going way far South - at least it felt like that to them. (Northerners feel anything past Delaware is the South LOL!  I guess you gotta be from NY or NJ to make such distinctions. Heck if you are from New Jersey you definitely distinguish if you're from Northern Jersey or South Jersey. It's a fact - ask anyone from NJ) And if your parents and family are all New Yorkers - well, going to Maryland for school - it was almost like going to a foreign country.

Now I live in the great state of Virginia - Northern Virginia to be exact. And while there are a few folks who are actually from NoVA - its quite a conglomeration of people from all points on the map - or at least that's the way it seems to me. It is rare to meet someone who was born here!


The reason I'm talking about North & South - well it's the "y'all". Never said y'all growing up. These little expressions started creeping in to the vocabulary - heck I don't know when it happened. But it is there. And you'll hear a lot of y'all-ing going on round here. And I kinda like it.


(Tracy - where are the cards? Can we get to the cards please?) Yes. There are cards - you know there will be cards.

I recently purchased some adorable papers and a few embellishments from Doodlebug. ( yes Doodlebug of the sugar-coated cardstock fame here on my blog).  I needed to make some cards to send to some family. I've got a list of people I try to card monthly - the dear ones I don't always get to see - some I rarely get to see (they're back up North ;-)). I wanted to use a cute little Papertrey Ink set  called Nuts for You. The set has this darling squirrel, acorn, and leaf.


I thought the papers Doodlebug came out with recently, called Friendly Forest, would be perfect.  I've got a few more cards to make but thought I'd share a couple I've got made here.

The "hello" on the first card was made using my Silhouette Portrait. I thought the big sentiment would look cute with those adorable Mini Doodle-Pop cardstock stickers. Oh they are cute. (can you see the plaid on the leaf - sooo cute. I love plaid in all of its shapes and forms) That little fox is so precious I'm going to have trouble mailing him off. (musn't hoard, musn't hoard...)

On the second card I used Papertrey Ink's Stenciled Alphabet Blocks Die to create the banner. I used some more of the patterned papers behind each letter. And the squirrel is sitting on sort of a crazy quilt of patterned paper but I love it. There are so many pretty papers in the pad I wanted to use them all.


 One last card - I used some more of the papers to create the last card. I used a sentiment and tree trunk die from Papertrey Ink's Trendy Tree Tops. (I haven't pulled that set out for a while - yay for using some older stuff). I did use a circle punch for the tree top and made my own little banner for the sentiment (I inked that cardstock up with some Tim Holtz Antique Linen Distress Ink so it would work better with the cream background in the papers).

Alrighty. That's all for today. Y'all have a good one!


Saturday, August 23, 2014

Ants and French Fries


Just a quick little card.
I got these Clear & Simple Stamps a while back and they've been whispering to me to play with them. It was the sentiment that really sent me over the edge to buy the sentiment set and the images are just so cute.
If an ant could be cute.
I'm not really a fan of ants.
At all.
But I am a fan of french fries.
I stamped them on cardstock and die cut that with those stitched rectangle dies from Lil' Inker Designs.
And the gingham...
Gingham makes me think of picnics.
Picnics make me think of ants.
It's all very logical, oui?
Have a good one!

Friday, July 25, 2014

Morning Glory Hello


Got a quick one one for today
I bought the Papertrey Ink Year of Flowers Collection a long time ago but really hadn't used them a whole lot. They recently introduced dies for the set and I couldn't wait to pull out that stamp set. I love a number of the flowers in the set but I think the morning glories are one of my favorites. For this card I used some Papertrey patterned paper, the Monthly Moments: Instant Photo 2 die and some Rustic Creme twine. I colored the image with Copics. The "hello" sentiment is from a new set: Big Ticket Additions. I had to do a little masking (to remove the ticket portion of the stamp) but it only took a few minutes. Despite the floral image I think the card has a bit of a masculine feel (as this card is going to a male member of the family). Ok - gotta run. Hope you have a wonderful day!

Tuesday, July 22, 2014

Make it Monday #173 - No Outline Watercolor

So you may've noticed - I'm not the trendiest girl in town. I am intrigued but it often may take me a bit of time to jump in. It's more of wallet issue with me. I love classic things (at least in my mind what is a classic ok) and I find it easier to put my money down on something I know I'll use for a long time.

Watercolor is classic for sure. And it makes the rounds in the stamping world and it's back again. It really never went out of style right? Nah :-) That being said, I am often reluctant to pull out my watercolors when I've got pencils and markers that can get me there a little quicker. But I decided I had a couple of cards to make and I'd try this week's Make It Monday over on the Papertrey Ink blog. I haven't participated in the MIM for a while.

This is where I segue into the little promise I made to myself. What's that you say? I need to give some of my older stamps some love. You know how it is - you buy new stuff - use it for a bit - then you're on to the next thing. Am I right? C'mon... you know what I'm talking about :-)
Okay so I'm determined to make it a regular habit - I'm makin a new category here on my blog - Everything Old Is New Again. After overhauling all my woodblocks and looking at quite a collection of clear stamps - I need to use them! So... here's my first installment.

These are not my oldest stamps for sure - but they haven't gotten any love in quite a while. I used PTI's Strawberry Patch and Background Basics: Sheet Music. The sentiment is new - Banner Sentiments (and I didn't even use the banner - go fig!)
I pulled out my old watercolor set and some watercolor paper I had and stamped in PTI Fine Linen. I stamped twice figuring I'd just see how it went. Watercoloring and me are not the best of friends. I used to get very frustrated with them. I wish there had been a course in watercolor when I was in school. But it seems these days I've gone from the perfectionist I was (back oh 10 years ago) to a more go-with-the-flow kinda girl. I like her better ;-)

So I colored away with a water pen and really enjoyed myself. I decided the finished card might look nice if I did something with the background. I picked out the sheet music stamps. I pulled out a post it note pad and made myself a mask (not being too fussy about it and stamped that music all over.

On the second card I did go back and edit the mask a little - cutting deeper into the image hoping to get some more of the music stamped there. Then I stamped on the sentiments (one's a little crooked and one's slightly smudged - that Versafine can be a little finicky but its such a gorgeous black yaknow). On one of the cards I decided to try some Rustic Cream twine. And on the other card I went back in with a white Gelly Roll pen and put the seeds back in the strawberries :-)

Overall - I'm pleased. And it was a very relaxing to just paint away and not get too wound up about every little detail.  I may have to pull out the watercolors again real soon.
Have a good one!


Tuesday, February 25, 2014

PTI February Blog Hop

So over the weekend I was anticipating this blog hop and didn't know what I was going to do. I did however want to try something I'd been thinking about for a while - which was trying coloring images on different colored cardstock. So I pulled out the Year of Flowers: Daffodils set. I'd bought it a little while back but hadn't had a chance to use it. I stamped the image on Fine Linen, Soft Stone and the Guide Lines 1 Grid cardstocks. All were colored with Copics (originally stamped with SU Sahara Sand - I wanted the stamped image color to be more muted).
The first image here is the one stamped on the Guide Lines Grid paper. I think this one's my favorite. I stamped the sentiment in New Leaf ink.


The second card is stamped on Soft Stone. I kinda like yellow and grey together. I masked the same sentiment to just use the word "hello" and stamped in Smokey Shadow. Not my favorite - I was having some trouble with my shadowing ;-(


And for the last card - stamped on Fine Linen cardstock. The sentiment is stamped in Kraft ink.

It was a fun little experiment. I actually did another card - stamped on Kraft cardstock and colored with Prismacolors - that'll be a post for another day.

Thanks for stopping by!