Showing posts with label Everything Old is New Again. Show all posts

Thursday, July 16, 2015

Let's Play: Turning solid stamps into one you can color

Hello friends! Yes I'm back today with something I've been playing with over the past few days but I've been thinking about for a while. Get your favorite beverage and set a spell.....
I love to draw and color. And I've been doing that a lot lately - especially with Kathy Racoosin's 30 Day Coloring Challenges (if you don't know about these - please get yourself on over to Kathy's blog and do a search pronto!). And it's been so much fun. While the challenge was going on - and I wasn't drawing something to color or using some stamps to color - I discovered something. I have a LOT of stamps I cannot color. The horror! I have a lot of stamps and the vast majority are solid image stamps. Meaning there are no lines - you stamp a solid color. Now of course some of them are 2 step stamping sets that add wonderful dimension but, in short, there are no lines. I thought I wish I could use some of these stamps in the challenge.... but how? They aren't the kind of stamps you can color in with markers, pencils, or watercolors. Then I had an idea. I'm sure someone else has had this idea but I haven't seen it anywhere. It's actually kind of the opposite of the "no-line coloring" that's so popular now - except you're putting in lines. Follow me....
So here's an image from Avery Elle's Petals & Stems on the left. On the right - same stamp!
The flower on the left is stamped as is with a dye ink. The flower on the right - stamped as is with Tim Holtz Distress Ink, inked (basically tracing the image) with a Copic friendly pen then colored with Copic Markers.
Crazy right? Completely different look and all from the same stamp!
Okay you want to see another???
This time it's one of my favorite stamp sets - Papertrey Ink's Cutting Garden It's just got the prettiest flowers and leaves! It's a bit more elaborate than the stamp above so let's see what happens with that shall we?
Here I stamped using the set as is - a couple of different inks and a little masking to put the small flowers and leaves behind the larger image but pretty straightforward stamping. (The sentiment is also PTI - Graceful Greetings for the record). You'll note there are white lines indicating the petals - but that's where the stamp didn't stamp if you follow me - the negative. No lines.....
Okay now let's see what it looks like when I want to make it a stamp I can color in with Copics!


Pretty cool huh? It looks completely different doesn't it? Again, I stamped with a Distress Ink (Fine Linen), then used a Copic Friendly pen to trace the petals and colored it with Copic markers.  Just for the record my Copic friendly pen for this isn't a Copic - it's a pen I draw with - it's a Pilot G-Tec-C4. Love that pen. But I've used it a ton and it works perfectly well with Copics.
Okay - are you curious about what would happen if you wanted to watercolor using this technique? I'm so glad - I tried that too!


And here's what it looks like colored in Zig Clean Color Markers and embossed with white embossing powder. Kinda pretty. I had to do this a little differently - using a Zig Embossing Pen - which I don't think are available anymore. It's basically the same as a Versamark pen (I couldn't find mine). You draw with the embossing pen over those lines in the stamp then add embossing powder, heat with your heat gun and go ahead and color. I did try with clear embossing powder - it works nicely. I'm not showing a sample here because again I had to use the Embossing pen - and that ink has a blue tint to it - and that blue tint stays trapped under the clear and you get pale blue lines - here with the white embossing powder you see none of that.

Just so you can see what it all looks like before I added color to the images here's a few pics I took while I was trying all of this out.

When I started with this I pulled out a few stamp sets. This rose is from Papertrey Ink's Rosie Posey. I stamped the rose in Fine Linen Distress Ink and then added the pen. I'll don't have a pic of the colored rose. I was going to watercolor this rose - stamped it - then inked with my Pilot pen - should've used my Pitt Pen which is waterproof - so you know how that went. I had the black ink running - ugh. I shall have to go back and try the rose with the Pitt Pen in watercolor because I think it would be pretty beautiful.
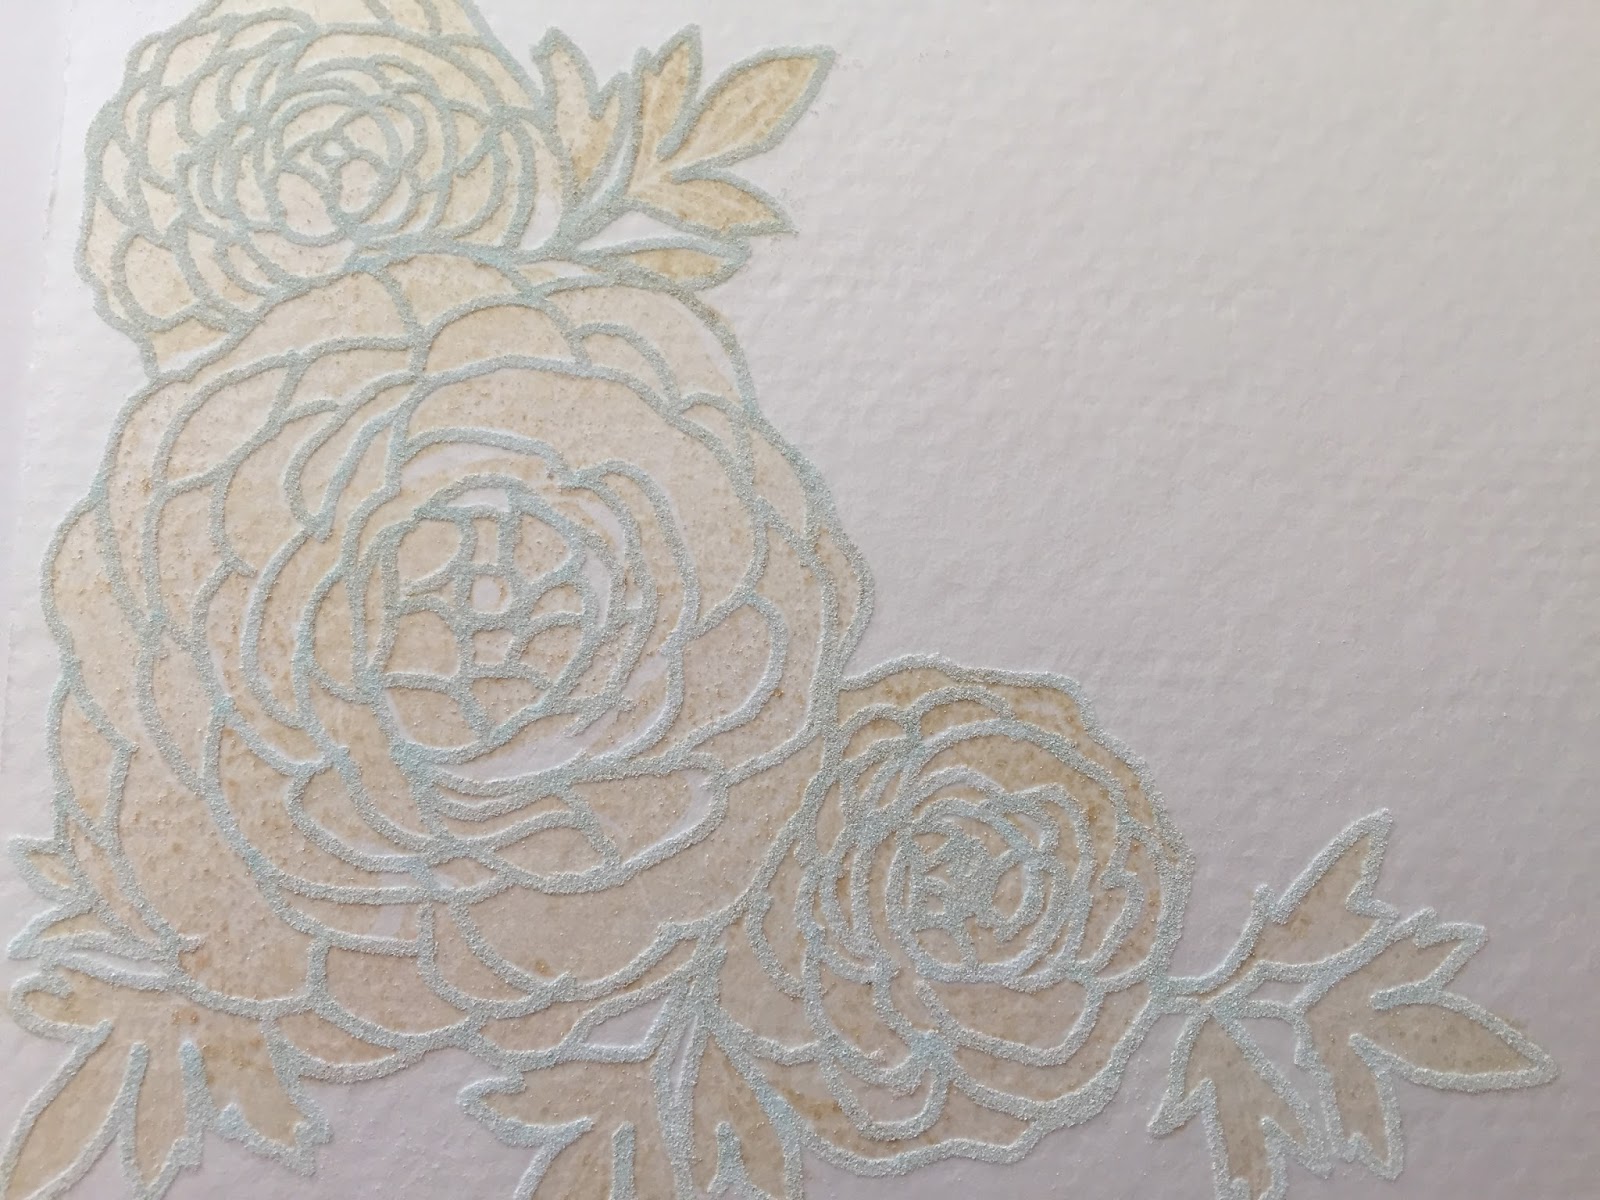


 I hope you can see this. This is before I heat embossed the image and added color. You're seeing the distress ink and the embossing powder there. When you color it in the Distress ink really isn't an issue


And here's the image stamped in Fine Linen Distress Ink, then inked in pen before I colored with Copics. I think besides coloring with Copics I loved this part the best. You really don't have to be someone who draws on a regular basis. You are just pretty much tracing what's there. And you can edit if you like. Say you want fewer petals ... you just draw in the ones you want! I was a little concerned having that much Distress ink in contact with my Copics. I happen to have a duplicate of one Ciao marker - so I tried with that first - thinking if it got ruined I always had the other pen. I swear it did not damage my pen.
So what do you think? I think I can now get a lot more life out of the stamps sets I own - and that's an amazing thing! And when I purchase solid stamp sets in the future I've got another technique in my arsenal to color them any way I'd like. Yay!
Okay that's quite enough for today right? I'll close saying that Kathy Racoosin is hosting another Coloring Challenge in either September or October - and if you love to color - you need to join in the fun! And please come over to Instagram, if you haven't already, follow me there - say hi okay? I really would love to know what you thought about today's post - can you comment below please? Thanks so much for stopping by!


Thursday, March 19, 2015

Doodlie-do Thinking of You


Good Morning Friends!

Since I've been participating in the 30 Day Coloring Challenge, I've been pulling out stamps that I haven't used in a while.

Doodlie-do is one of those stamp sets. I made two cards using the stamps. One card colored in browns and teals and the other card colored in pinkish tones - not unlike Papertrey Ink's color Berry Sorbet.

I used a die from the Keep it Simple Frames and added a sentiment from Keep it Simple: Thinking of you.

That's all for today.
Thanks for stopping by!


Tuesday, March 17, 2015

Dear Ones March Card - Happy St. Patrick's Day

Happy St. Patrick's Day Friends!
Not a huge holiday for everyone but in my house - it's a big deal. My mother was 100% Irish - first generation American. My grandparents came through Ellis Island. I could go on and on but suffice it to say we are proud of the Irish heritage. Every year I bake some Irish Soda bread - my grandmother's recipe (I skip the corned beef and cabbage however....). I wish I could share that with my "Dear Ones" but they are all so far away. So this month's addition of my Dear Ones is a St. Patrick's Day card. I know they'll be happy to see this shamrock and all the green! The shamrock itself is a PSX stamp, The tag die and paper are from Papertrey Ink. I colored the shamrock with Copics.
That's all from me for today. Thanks for stopping by!

Tuesday, March 03, 2015

Year of Thinking of You - September

Well - this edition of my "Year of Thinking of You" cards should probably be August - but I got a little mixed up when I was posting all these cards. No matter - my sister-in-law will send the card she wants to send at the appropriate time right?
We're a big beach family - we've got a family home at the beach in Delaware. This sister-in-law (the one who is sending these cards) is especially fond of the beach and the friend she's sending the cards to has been a visitor to the house on many occasions. I knew my s-i-l would like to include a beach-y card to her friend.
I found the sentiment in the Silhouette design store a few years ago. I actually made t-shirts for us all with that cutfile :-) So I decided to put it to use again this time by making it a print & cut file. I printed it off and distressed the edges a little then mounted it on a piece of cardstock I ran through my cuttlebug with the Woodgrain Impression plate from PTI. I distressed that woodgrain piece after adding some Fresh Snow ink. The stamped the background cardstock with some stamps from StampinUp (long since retired - Stipple Shells) with Versamark. Finally I tied on some Rustic Cream twine. Ooops - almost forgot - I diecut that starfish using an old die from Quickutz. Thanks for stopping by!

Tuesday, February 17, 2015

Thinking Spring

Good morning friends. Thought I'd throw a little spring into our lives with a little tag I made for a gift not too long ago. (okay I'm stalling going outside and shoveling last night's winter offering... that four letter word: snow. I know June and Amy - you like it! Me - it's not like I hate it. Not at all. But sometimes it's, how shall we say it... hmmm... incovenient? yeah. that's it!)
I used some Papertrey Ink products (quelle suprise!): Tag Sale #1, Tiny Tags, Year of Flowers Collection dies; Tiny Tags, Year of Flowers Collection, Background Basics: Twinkle. For the background I added in those wee dots of white with a white gel pen and I colored in the leaves with Prismacolor Pencils. Now the little flowers could be left white obviously but I wanted them to stand out so I used a Copic marker (that matches the cardstock) to color in the area surrounding the entire diecut (you know that white area).
I don't know about your garden but mine has bulb coming up all over - now covered in snow. But it won't be long now and I cannot wait.
Have a wonderful day! (yes... it's now time to stop stalling and commence with the shoveling).


Sunday, February 15, 2015

More Valentines - I love you more than.....

Hi there friends. I said I'd be back with a few more Valentines. These were for my husband and two kids. "I love you more than...." seemed to be my theme for this year.
First one - for the husband - lover of maps, stars, space etc. I couldn't find a sentiment I wanted so I just wrote it myself. I just stamped the PTI Star Gazer Additions stamp with Versamark, clear embossed it and went to town with four different inks.
He liked it.


Next up - the card for my son. I was here in my craft room, looking for something (and I honestly can't remember what that was now....) and I came upon a box filled with diecuts (the premade kind available way back when...). I saw this pizza die cut that I'd originally purchased to put on a scrapbook page about this very same child. I decided why not just use it already! So I glued all those pieces together, embossed some white cardstock with a stylus- to create a napkin - and put that on a cardbase covered in some PTI Pure Poppy gingham patterned paper.  I just printed out the sentiment on my computer.
Suffice it to say this child loves his pizza - he comes by it honestly - pizza is in our blood.


And finally, a valentine for my daughter. This kid was not originally a coffee fan - but somewhere along the line, in high school as I recall, she decided she liked coffee. And often times we both can be found, oh around 4pm, gathered around our Keurig, brewing ourselves a cup. I have been on a Silhouette kick lately - trying to use it as much as possible - learning still what it can do after 2 years. I saw this print & cut coffee cup in the Silhouette store. Printed & cut same, added a computer generated sentiment (inside it says "and that's a lot"). She laughed when she saw it - saying something to the effect - well that IS  alot. Everyone knows I love my coffee.
But I love these three more (more than the stars in the sky, more than pizza and more than coffee).
Hope you had a lovely Valentine's Day. My husband and I had just the nicest time - went to the movies (The Imitation Game - such a good movie!) and out to dinner. This was our 33rd Valentine's Day together. I think it's fair to say it was our best ever. :-)
Thanks for stopping by.

Friday, February 06, 2015

Papertrey 8th Anniversary Challenge

Hi friends. I've been gone for a short bit I know. The husband and I took a little trip up to NYC last weekend and since then I've been playing catchup (ketchup? yea that too). I have also been doing a bit of scrapbooking. Perhaps I'll share that soon.
Anyway it's that time of year again - Papertrey Ink's Anniversary celebration and that always includes tons of challenges which are always great fun, don't you agree?
As I said I've been scrapbooking and playing with all manner of supplies and techniques I hadn't done in years. Which brings me to my entry into the first challenge over at the PTI blog. (You were wondering when I'd get to that huh?) The challenge is to use inspiration cards (sketches and color schemes) to come up with a card.  My card is loosely based on this sketch. My colors are loosely based on two of the color schemes. I think the inspiration cards are just that right? Used for inspiration. okay....

I decided on using the Friendship Jar Spring Fillers stamp set - I wanted to use those conversation hearts. But first I wanted to create a bit of a background - using the Background Basics: Hearts. I created a mask  & a template using the PTI jar die. I adhered the mask then stamped in the BB: Hearts with Versamark. I peeled up my mask then used the template to mark off where the jar would go. Then inside that area I stamped the conversation hearts. I colored those with prismacolor pencils and mineral spirits. Then went back in and stamped the words. Then I took a Copic Marker (Dull Ivory E43) and colored in my jar. I went back over that with a line drawing (since I don't have the Jar Stamp) using probably my new favorite pen - a Pilot G-TEC-C4.
Then I went back to those background hearts and used some chalk to color those in (the chalk sticks to the Versamark - an old technique but a fun one!)
Finally I cut a tag using the Tiny Tags die and stamped it with one of those little conversation stamps. Then I poked some holes into my card to tie the tag on with some Rustic Cream twine.
I gotta say I had such a good time with this. I hadn't been drawing in way too long and as much as I love my Copics I adore my Prismacolor pencils.
Okay I'll shut up now. I need to start looking for some inspiration for the challenge posted today. Hope you're having a good one.


Monday, January 26, 2015

It didn't work for the challenge but I like it anyway

Hi friends. Did you ever see a challenge on a "challenge" blog and decide you're going to give that a go and realize... no, that's not gonna work. Well, maybe you haven't. Maybe you kept trying and you made something you liked and yay for you! :-)  This time I don't think it worked out for me for the challenge but I like that I still made something.
The challenge I saw was for paper piecing which I happen to enjoy so I thought great - I'll try that. Then I realized the stamps I had really don't lend themselves to paper piecing (you needed to use a particular company's stamps) - they're not line stamps - more flat image. I thought about it some more and said I'm making something with the stamps I have anyway - they haven't seen ink in a while. So I set off making this card. I went to my patterned paper scrap box and chose that plaid piece. Then I found another piece of patterned paper with polka dots and stamped my image on it with a similar but darker color pink. I liked how that came out and clear embossed it. I like that you can still see the polka dots right through the stamping. I found yet another piece of patterned paper - this time the green paper I cut the leaves from - it had a very subtle pattern and texture too. I stamped the leaf image from the set on the paper with a similar but darker ink - it picked up the texture which I really liked. I finished the card using one of the sentiments in the set and I had a card. Not the card that I set out to make but it worked out fine in the end.
Hope you're having a good day - it was lightly snowing earlier here but has stopped. I think we're dodging the "blizzard" bullet here in northern Virginia. Thanks for stopping by!

Tuesday, January 20, 2015

Year of Thinking of You - probably April

I say probably April cos I'm not sure if that's the month she'll use it. It seems like it might be better suited to May or June. Regardless, I made two cards: one with a red bike and one with a pink bike. The red one is going to my s-i-l and the pink one is going to a friend.
I used two stamp sets from Papertrey Ink: the bike image and sentiment come from Pedal Pusher. The flowers come from Just Smile. For both cards I drew my own banner, cut it out, then stamped on the sentiment. For the pink card, I drew in lines tying the banner to the bike. On the red card, I used some bakers twine to tie on the banner to the red die cut bike.

You can probably see that on both cards I used some foam tape to pop up those banners a little.
I added some brads to the red bike's wheels.

Oh and did you notice the envelopes underneath the bikes?  I found some old Making Memories long (business sized) envelopes in my stash. I had some cute washi tape my sister had sent me a while ago that had a very similar color scheme to those flowers on the cards - so I added some washi to the envelopes. I should've taken photos of those envelopes too - but suffice it to say it looks cute.
okay that's it for today. thanks for stopping by.

Friday, January 09, 2015

Year of Thinking of You - February


So here's another for the "Year of Thinking of You" cards - February edition. I figured I might as well make February and mail it in the same envelope with January to my sister-in-law.
This was a pretty quick one. I'm also trying not to get toooo dimensional - this will cost one first class stamp - it's flat :-)
I used PTI's Birds & Blooms stamp set. I hadn't brought this stamp set out in a while - good to play with it again. It has just the prettiest sentiments as well as the cute bird and branch. I used the little heart in the set to embellish the branch with a bunch of hearts (it's for February right?).
That's all for today. Have a good one!

Thursday, January 01, 2015

Happy New Year! and a graduation card

Welcome 2015!
and welcome friends - good to see you for another year.
I needed to make a graduation card for a nephew/godchild who recently graduated college.

Now the color scheme here might seem to skew girly but I'm thinking more celebratory, confetti... I like it - sorta happy ya know? And what's happier than graduating college?

I used an older PTI set - Celebrations. It makes a fast card with those big sentiments - and you can't not love that. But for all its rainbowy, bold sentiments I felt it needed something. I decided on using an oldie but a goodie - a set of dies from Quickutz - a graduation cap. Those dies have more than paid for themselves given the number of times I've hauled them out over the years!
So yay - card #1 for the new year. And many more to come. Have a good one~

Wednesday, December 31, 2014

Year of Cards - January

You knew I'd get back here with at least the last of my "Year of Cards" didn't you?  Good, cos that's what I'm gonna do right now. But first....
It's been an incredibly hectic holiday season. I actually had to send off 2 boxes of gifts without their Year of Cards boxes because I just couldn't get them finished (the stamps I needed and ordered arrived but I was under a pile o'Christmas). But right after Christmas I got to work and whipped up 12 of these (yes, I made extra. Originally I'd planned on 8 YOC's gifts and started making 9 cards at a pop somewhere along the line. Then I decided I needed 9 gifts... suffice it to say I had a complete 8 sets then had to add in the month's I was missing... oyvey I was a card making fool). I had them all packaged up in time to bring to Parlett Christmas in Delaware on Saturday. And they were very much appreciated -  which of course made my heart happy.
So for January's addition I felt I had to use that perfectly beautiful sentiment (there are others in the $5 little set) - it was just right. But what else? I'd seen a card using tiny little snowflakes but I was looking for something a little bolder. Then I remembered I had a few snowflake stamps - in a set of Making Memories foam stamps (do you have any of those? I remember needing all those sets. And I do have quite a few. Those foam stamps are just the easiest stamps to use.) I pulled them out and selected a medium sized snowflake. I stamped them in Versamark and used clear embossing powder then finishing off  by sponging on PTI Aqua Mist ink. I had already decided I'd put a stitched border on the left hand side - machine stitching with some lovely silver metallic thread I'd picked up months ago in Hobby Lobby. You'll see here a couple of variations of stitching but on the ones I gave away - those all had two lines of straight stitching. I like how they came out (and they were quick to make - even with the stitching.)
Okay, I'm off for now. I am pondering the new year - aren't we all?  I just took a look at the years I've been blogging here. It will be 10 years in January. How can that be????
Looking forward to what 2015 will bring -  Happy New Year!

Sunday, October 12, 2014

It's Fall Y'all

I don't know if I've mentioned over the years - probably have - that I was born and raised in New York and New Jersey. The beginning of my migration south started in college. I went to school in Maryland. At the time my family
thought I was going way far South - at least it felt like that to them. (Northerners feel anything past Delaware is the South LOL!  I guess you gotta be from NY or NJ to make such distinctions. Heck if you are from New Jersey you definitely distinguish if you're from Northern Jersey or South Jersey. It's a fact - ask anyone from NJ) And if your parents and family are all New Yorkers - well, going to Maryland for school - it was almost like going to a foreign country.

Now I live in the great state of Virginia - Northern Virginia to be exact. And while there are a few folks who are actually from NoVA - its quite a conglomeration of people from all points on the map - or at least that's the way it seems to me. It is rare to meet someone who was born here!


The reason I'm talking about North & South - well it's the "y'all". Never said y'all growing up. These little expressions started creeping in to the vocabulary - heck I don't know when it happened. But it is there. And you'll hear a lot of y'all-ing going on round here. And I kinda like it.


(Tracy - where are the cards? Can we get to the cards please?) Yes. There are cards - you know there will be cards.

I recently purchased some adorable papers and a few embellishments from Doodlebug. ( yes Doodlebug of the sugar-coated cardstock fame here on my blog).  I needed to make some cards to send to some family. I've got a list of people I try to card monthly - the dear ones I don't always get to see - some I rarely get to see (they're back up North ;-)). I wanted to use a cute little Papertrey Ink set  called Nuts for You. The set has this darling squirrel, acorn, and leaf.


I thought the papers Doodlebug came out with recently, called Friendly Forest, would be perfect.  I've got a few more cards to make but thought I'd share a couple I've got made here.

The "hello" on the first card was made using my Silhouette Portrait. I thought the big sentiment would look cute with those adorable Mini Doodle-Pop cardstock stickers. Oh they are cute. (can you see the plaid on the leaf - sooo cute. I love plaid in all of its shapes and forms) That little fox is so precious I'm going to have trouble mailing him off. (musn't hoard, musn't hoard...)

On the second card I used Papertrey Ink's Stenciled Alphabet Blocks Die to create the banner. I used some more of the patterned papers behind each letter. And the squirrel is sitting on sort of a crazy quilt of patterned paper but I love it. There are so many pretty papers in the pad I wanted to use them all.


 One last card - I used some more of the papers to create the last card. I used a sentiment and tree trunk die from Papertrey Ink's Trendy Tree Tops. (I haven't pulled that set out for a while - yay for using some older stuff). I did use a circle punch for the tree top and made my own little banner for the sentiment (I inked that cardstock up with some Tim Holtz Antique Linen Distress Ink so it would work better with the cream background in the papers).

Alrighty. That's all for today. Y'all have a good one!


Wednesday, September 17, 2014

Year of Cards: February

I've been working away at my "year of cards" gifts for the family. I've been working on June in the past week and realized I'd forgotten to post February's edition. I used Papertrey Ink's Birthday Classics: February stamp set and Scarlet Jewel patterned paper. I also used a couple of Papertrey dies: the heart border as well as the Monthly Moments: Spiral Notebook die. I was feelin it needed something else so I hunted through my stamps and found an older set from StampinUp! - a Sell-A-Bration set called Fresh Vintage. Not sure if you can see it in the photo but it just adds a little something to break up that space. And on this particular card (there are 8 of these cards) I used a distressing tool to rough up the edges. I made half of the cards using the Fine Linen cardstock you see here. The other half I used Soft Stone. Both colors looked so pretty with the Scarlett Jewel and I just couldn't decide LOL!
I'll post June probably tomorrow. Thanks for stopping by!

Thursday, July 31, 2014

Christmas in July

It's the last day of July and I was feeling like it would be fun to make a Christmas card. Maybe it's the cool temps we've been having. Or maybe it's this cute stamp set and die: Phrase Play #6 from Papertrey Ink. There are sentiments stamps in the set covering a wide range of occasions - two of them being for the holiday season.
I played around with the set as is and then decided it might be interesting to fill that center area with another stamp- an image or a sentiment of some kind. I looked through my stamp sets and came up with Winter Hills. It took a little masking and adding a line here and there but I like the way it turned out. The sentiment is also from Winter Hills.  I used some reinker to color in the sky and highlight the snow. The house was colored with Prismacolor pencils. I used a Cuttlebug embossing folder for the background. Those 3 snowflakes were cut using a Quickutz die I've had for years. I used some Versamark and Holographic embossing powder on them - I think you can see a little bit of the sparkle. And I finished off with some baker's twine.
That's all for me today. Have a good one!

Tuesday, July 22, 2014

Make it Monday #173 - No Outline Watercolor

So you may've noticed - I'm not the trendiest girl in town. I am intrigued but it often may take me a bit of time to jump in. It's more of wallet issue with me. I love classic things (at least in my mind what is a classic ok) and I find it easier to put my money down on something I know I'll use for a long time.

Watercolor is classic for sure. And it makes the rounds in the stamping world and it's back again. It really never went out of style right? Nah :-) That being said, I am often reluctant to pull out my watercolors when I've got pencils and markers that can get me there a little quicker. But I decided I had a couple of cards to make and I'd try this week's Make It Monday over on the Papertrey Ink blog. I haven't participated in the MIM for a while.

This is where I segue into the little promise I made to myself. What's that you say? I need to give some of my older stamps some love. You know how it is - you buy new stuff - use it for a bit - then you're on to the next thing. Am I right? C'mon... you know what I'm talking about :-)
Okay so I'm determined to make it a regular habit - I'm makin a new category here on my blog - Everything Old Is New Again. After overhauling all my woodblocks and looking at quite a collection of clear stamps - I need to use them! So... here's my first installment.

These are not my oldest stamps for sure - but they haven't gotten any love in quite a while. I used PTI's Strawberry Patch and Background Basics: Sheet Music. The sentiment is new - Banner Sentiments (and I didn't even use the banner - go fig!)
I pulled out my old watercolor set and some watercolor paper I had and stamped in PTI Fine Linen. I stamped twice figuring I'd just see how it went. Watercoloring and me are not the best of friends. I used to get very frustrated with them. I wish there had been a course in watercolor when I was in school. But it seems these days I've gone from the perfectionist I was (back oh 10 years ago) to a more go-with-the-flow kinda girl. I like her better ;-)

So I colored away with a water pen and really enjoyed myself. I decided the finished card might look nice if I did something with the background. I picked out the sheet music stamps. I pulled out a post it note pad and made myself a mask (not being too fussy about it and stamped that music all over.

On the second card I did go back and edit the mask a little - cutting deeper into the image hoping to get some more of the music stamped there. Then I stamped on the sentiments (one's a little crooked and one's slightly smudged - that Versafine can be a little finicky but its such a gorgeous black yaknow). On one of the cards I decided to try some Rustic Cream twine. And on the other card I went back in with a white Gelly Roll pen and put the seeds back in the strawberries :-)

Overall - I'm pleased. And it was a very relaxing to just paint away and not get too wound up about every little detail.  I may have to pull out the watercolors again real soon.
Have a good one!