Always a hard thing to make aren't they?
One of the first sets I think I bought from Papertrey Ink was With Sympathy. I've unfortunately used that set a lot. It's a wonderful stamp set that has such perfect sentiments. It also has a companion set - With Sympathy:Loss of a Pet. I bought that set right away - it's a $5 set - PTI has so many great little $5 sets. And I thought I might have a use for it on occasion. When I bought it I'd asked my sister, who is a veterinarian, if she sent out sympathy cards to her patient owners? (When we'd lost two different cats to illnesses our veterinarians here sent so many cards and it was very touching and appreciated). She told me that she did. At the time I'd said I'd make her some using this set - she's very crafty but I knew she'd never get a chance - she's a busy girl - 3 little ones as well as being a vet - she rarely has time to craft. Well, as it happens I never got a chance either. Till now. I made a whole set of cards for her. I know she'll appreciate it - although I hope she never gets the chance to use them really. She takes the loss of her patients pretty hard. But if the need arises she'll have a card to send handy. I used some Fine Linen pattern pack papers, the Card Base-ics #2 die and the Buttoned Up #1 die - all from PTI. I altered the Card Base-ics die cut a little - trimmed it down about 1/4 inch on all sides to create the look I wanted - but i still wanted those notched corners. I have a punch from StampinUp which put those corners back. I also used some black embroidery floss for the die cut buttons and I clear embossed the paw prints. Here's a few more pics
Okay that's all for today - hope you have a good one!
Monday, December 03, 2012
Sunday, December 02, 2012
Make it Monday #93 Splitting Die Cuts
a real quick post here (i'm supposed to be making dinner ;-)) Another birthday card for that nephew who is turning 13 (this one is from my mom). I used the Celebrations die to cut the shape for the sentiment - I actually cut it out using kraft cardstock and some striped patterned paper I had. I cut apart the striped diecut and adhered it to the uncut kraft diecut. Then I stamped the large sentiment onto the kraft cardstock. I assembled the rest of the card and added the small sentiment at the bottom. Both sentiments are from the Celebrations stamp set.
ok.. i better get on that dinner! Oh yes - I was trying out the Papertrey Make it Monday challenge on Nicole Heady's blog!
Wednesday, November 28, 2012
Star Birthday Tag and Card
I've mentioned before I have numerous nephews haven't I? Yes I know I have. I'm quite lucky. (I've also got some amazing nieces but it's not one of their birthdays so I'll have to talk about them another day.) One of the nephews (my sisters eldest) is about to turn 13 - an auspicious occasion to be sure. For me it is hard to believe but yet it is so (I've got one nephew who is 36 but each one's 13th birthday seems to be a marking point now doesn't it?). I wanted to send him a fun card and make a tag for his gift - which is already on its way to him (my sister, who lives on the other side of the country, is used to wrapping my gifts :-( but I don't always get a tag in the mail - well I am this year!) I had Betsy Veldman's recent post about chalkboard art on the brain so I made this tag. Used Papertrey Ink stamps and number dies. The tiny white embossed heart is from the superstar border die from PTI but the larger red star is EK success papershaper punch. The tag was a #6? shipping tag I covered over with kraft and black cardstocks.
On to the card - I used the Boy Basics Simple Circles and 2012 Birthday tags stamp sets as well as the Coverplate Circles die. I stamped the main image in two different colors and clear embossed them (yes you can emboss dye ink you just gotta be quick about it!) then I cut them apart and reassembled so I had a two color image. The "celebrate" was embossed with white ep (i stamped that in versamark).
Ok - I really gotta run - laundry and making dinner are next up on the agenda.
Have a wonderful day!
On to the card - I used the Boy Basics Simple Circles and 2012 Birthday tags stamp sets as well as the Coverplate Circles die. I stamped the main image in two different colors and clear embossed them (yes you can emboss dye ink you just gotta be quick about it!) then I cut them apart and reassembled so I had a two color image. The "celebrate" was embossed with white ep (i stamped that in versamark).
Ok - I really gotta run - laundry and making dinner are next up on the agenda.
Have a wonderful day!
Saturday, November 24, 2012
A birthday card
How are you? Survived Thanksgiving I see. Me too. Although I'm too pooped to pop (a family expression - means I'm tired!). Actually I am gaining a little steam. I had to work yesterday (Friday) and when I got home, I did veeery little LOL. I was makin up for Thursday when I did a lot. Anyway earlier in the week, before Turkey, stuffing, pies etc I quickly made a card for my dear Aunt (who is also my Godmother). She will be celebrating her 94th birthday on Monday and I wanted to make sure I got that card in the mail by yesterday. So I made the card and set it aside to mail. With all the turkey day festivities etc I totally forgot to put it in an envelope and address it. On my way home from work yesterday afternoon I realized it. eek! I got home, quickly pulled out an envelope, addressed it and ran it out to the mailbox - fortunately the mailman hadn't been by yet. So the card - I used 2 Papertrey Ink sets: Autumn Abundance and Tagged Sentiments. I also used the Scarlett Jewel Pattern Paper pack and Mat Stack 3 and Mat Stack 3 Layerz dies. I colored the image using Prismacolor pencils for the flowers and vase and copics for the leaves. I took this pic right before I put the card in the envelope - inotherwords reallllly fast. Shame cos I was quite pleased with my coloring with the pencils and you can't really tell here.
Anyway - I need to get a move on. I have some online shopping to do LOL! I'm trying to avoid the stores as long as I can. The online shopping - I know what I'm buying today (2 birthday gifts and 3 Christmas) for a niece and 2 nephews. I'm just not prepared for the mall yet! Have a wonderful day.
Monday, November 19, 2012
Happy Winter Birthday
I had some of that Spring Rain cardstock on my drawing table from the card from yesterday so I thought I'd make a birthday card for my husband's aunt. Her birthday isn't until the end of December but ya know - when the spirit moves you, you gotta go with it! I pulled out Papertrey Ink's Winter Hills - I sooo wanted to use that house image stamp again as well as the wonderful sentiment - Happy Winter Birthday (I don't know why I love that but I do!). I stamped the image onto the Spring Rain cardstock and used my Prismacolors (and a little mineral spirits) to color that in. Then I used the wee snowflake stamp in the set to stamp a partial background in Versamark on the left side of the card. I embossed that with white embossing powder. I used one of the Half & Half dies to cut out the white cardstock you see on the right side of the card - well actually I cut it out twice. I mounted the image onto the long piece and stamped the sentiment on the short white piece. I liked the card but felt it needed something else and tried a variety of different ribbons and finally settled on using some bakers twine. (It kind of solved my dilemma having chose to color that barn and door in the image in a red prismacolor pencil - pulled it all together - see what i mean?) alrighty. I'm off to bake - today it's Pumpkin Apple Streusel Muffins for Thanksgiving (I gotta fit this stuff in when I can LOL) Have a good one!
editing to add a revised photo:
okay - so here on the left I've made a little change. I'd resisted tying that bakers twine - but today the card was sitting on my table still and I said what the heck. I took a piece of the twine and wrapped it around my hand 3 times then took that and tied it on the piece I'd already attached to my card - then snipped the ends. I'm happier with this faux bow then the original version of the card. I should say at this point this twine is the real deal twine. On a huge spool - just like they used to used in the bakery when I was a kid. I see the kinds available now - so much thicker and very nice but I've got a huge spool of this - so use what you have, right? ok I need to make a birthday card now before I have to shut down my little craft room for Thanksgiving LOL. Too much cooking, baking etc for any craft time. Anyway - to all my fellow Americans - have a wonderful Thanksgiving!
editing to add a revised photo:
okay - so here on the left I've made a little change. I'd resisted tying that bakers twine - but today the card was sitting on my table still and I said what the heck. I took a piece of the twine and wrapped it around my hand 3 times then took that and tied it on the piece I'd already attached to my card - then snipped the ends. I'm happier with this faux bow then the original version of the card. I should say at this point this twine is the real deal twine. On a huge spool - just like they used to used in the bakery when I was a kid. I see the kinds available now - so much thicker and very nice but I've got a huge spool of this - so use what you have, right? ok I need to make a birthday card now before I have to shut down my little craft room for Thanksgiving LOL. Too much cooking, baking etc for any craft time. Anyway - to all my fellow Americans - have a wonderful Thanksgiving!
Sunday, November 18, 2012
a change of pace
Taking a break from the Christmas stuff to make a card for a baptism. One of our nephews had a little boy not long ago and he will be baptized this coming weekend. Unfortunately, in a state too far away so we will be unable to attend :-( But of course a card is not out of the question right?
Now I have a lot of stamps but I don't have anything appropriate for the occasion. I know... I've actually looked off and on over the years but never found anything quite right. So I went in search this morning but still came up empty. My backup plan was to find a paper or an embellishment to use. On that score I got lucky and found some lovely crosses from Jolee's. So I got that and a package of faux pearl embellishments (Recollections) and got down to business. I printed the sentiment on my computer onto some vellum and clear embossed it. I cut out those frames using Papertrey's Mat Stack 3 and Mat Stack 3 Layerz. Also embossed a piece of cardstock with a Cuttlebug embossing folder.
Okay that's all from me today - I'm off to make a lasagna for Wednesday - yes Wednesday - cos I'll be too busy to cook with all the Thanksgiving prep and will still have a house full of hungry people! Have a good one!
Now I have a lot of stamps but I don't have anything appropriate for the occasion. I know... I've actually looked off and on over the years but never found anything quite right. So I went in search this morning but still came up empty. My backup plan was to find a paper or an embellishment to use. On that score I got lucky and found some lovely crosses from Jolee's. So I got that and a package of faux pearl embellishments (Recollections) and got down to business. I printed the sentiment on my computer onto some vellum and clear embossed it. I cut out those frames using Papertrey's Mat Stack 3 and Mat Stack 3 Layerz. Also embossed a piece of cardstock with a Cuttlebug embossing folder.
Okay that's all from me today - I'm off to make a lasagna for Wednesday - yes Wednesday - cos I'll be too busy to cook with all the Thanksgiving prep and will still have a house full of hungry people! Have a good one!
Tuesday, November 13, 2012
Love Lives Here Holiday Ornament
Which brings me to the next thing. The little sentiment you see here - well I altered it a little. It's from PTI's Happiest of Holidays - an absolutely wonderful set! Those lines on the banner weren't long enough to make me happy for my purposes here (and there were some other pesky words in the way LOL) So again I'm altering things up. Here's a pic of the stamp as is next to the ornament I made.
So I stamped the sentiment then extended the lines with a pen then cut out the parts of the sentiment I wanted to keep, distressed a little with some Tim Holtz Antique Linen and voila... sentiment that suits my needs :-)
Ok I gotta run. Have a date with some chocolate chip cookie dough and my Mom :-)
Thanks for looking!
Monday, November 12, 2012
Have Yourself a Merry Little Christmas
can't you just hear Judy Garland singing?
ok so now you can
ok so now you can
Love "Meet Me in St. Louis" don't you?
Seeing as I've been on a vintage music sheet kick I thought I'd throw in the music itself.
Alright - on to the card...
which coincidentally has sheet music for this song in the background. And in the foreground - Papertrey Ink In the Meadow die of that cute sledder as well as the hill itself...and the sentiment is from PTI's Think Big Favorites #20
Labels:
holiday,
Papertrey Ink,
stuff i'm makin,
What I'm listening to
Christmas Tree
I used PTI's In the Meadow stamp set and dies again. I just love the sentiments in this set - as well as the timeless images. You can't beat a silhouette sometimes. So much information in a shape - just the impression and your mind fills in the rest. Genius.
Anywho...Like yesterday, I printed out the sheet music and used a little TH Antique Linen around the edges.
For the tree - I originally tried stamping the snowflakes using versamark (as you see in the bottom section with the sentiment) but I just wasn't liking it. So I tried again with the Fresh Snow inkpad - I think it ties the tree to the sentiment nicer. I also clear embossed both the snowflakes and the sentiment. When I was done with all that I thought it needed something. I remembered seeing someone's card where they put a little cardinal in the tree and I thought that might finish it off - he looks kinda cute (and the red ties the background to the foreground - so that was that).
Sunday, November 11, 2012
Dashing through the snow
So today I have a card that came together so nicely for me and I love it. I think I shall make a few more of these. I was looking around for some sheet music online - something Christmas-sy (is that a word?). I do have some vintage sheet music in my stash but not Christmas. I found it in no time (isn't the internet a wonderful thing?)and printed some up and here's what I did with it.
I used Papertrey Ink's In the Meadow stamp set & dies for the sentiment and sleigh, some of their Scarlett Jewel cardstock and patterned paper. I'm not sure if you can see it but I used some Tim Holtz Antique Linen ink to distress around the edges of the music sheet (even though it was a lovely aged yellow right off my printer it needed the edges darkened up). I adhered the sleigh with pop dots. Then I took a long look and decided it needed perhaps some ribbon? Nah.. then I knew what would finish it off - some german scrap I had in my stash. I do so wish there was a die for that! LOL It's similar to a rick rack or a pinked edge but that really isn't the look I was going for - and that german scrap is embossed with the lovliest beading detail yaknow? So there you have it - sortofa clean and simple vintage card. I'm gonna try a few more of this type card with some more of the stamps/dies in that set.
Have a lovely day!
2 More Christmas Cards
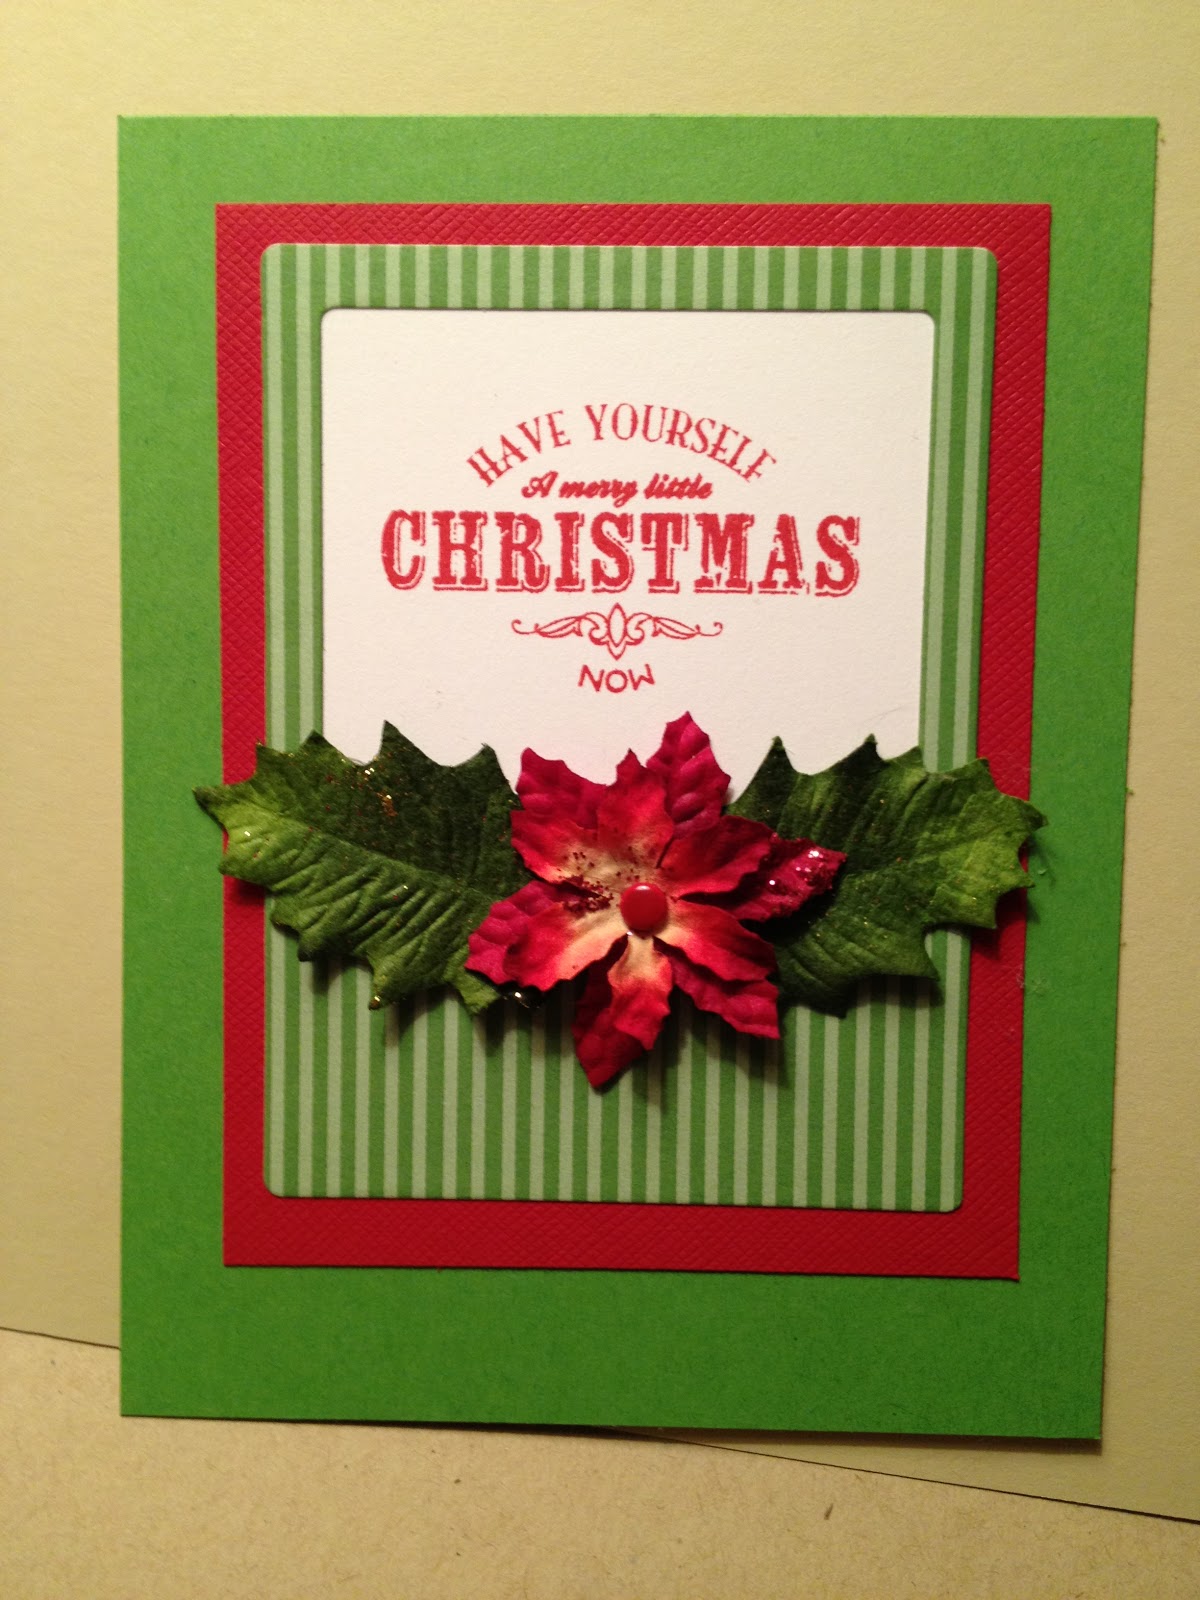
Hi there! Today I've got 2 cards to show you. Both cards feature sentiments from Papertrey Ink's Happiest of Holidays stamp set. I also used the Fabulous Frames die for both cards. On this first card I used some PTI New Leaf patterned paper and I dug around in my stash and found a tin of Prima Holiday Poinsettias (which also contains some lovely holly). Quick easy card right?
The next card I used a few of the patterned papers in the Scarlet Jewel patterned paper pack and tied on some gold ribbon. Another quick one but I really like how it came out.
Okay... Have a wonderful day!
The next card I used a few of the patterned papers in the Scarlet Jewel patterned paper pack and tied on some gold ribbon. Another quick one but I really like how it came out.
Okay... Have a wonderful day!
Saturday, November 10, 2012
There's No Place Like Home for the Holidays
Now onto the Thank You....
We had a lovely visit from my husband's Aunt on Monday. She is such a wonderful woman and the very best house guest ever. And she never comes empty-handed as she is impeccably good-mannered as well. A few bottles of wine and the most wonderful rooster tin sculpture. I'm in love with him. I need to snap a pic to share. At any rate I needed to thank her for said Rooster (kicking myself I didn't purchase that fabulous On the Farm set PTI came out with a few months back - that Rooster in the set would have been the ultimate in appropos thanking!) and came up with this card. I don't know if you can see the yellow in the background patterned paper but that is what dictated my choice of a mustard ink for the main image here. I originally tried the "red" ink I used in the card above but it wasn't a good match. The sentiment image is from Tagged Sentiments. (That patterned paper is from my very old stash of Chatterbox papers - sigh - I loved Chatterbox....)
Okay now back to folding laundry... Have a good one!
Labels:
around our house,
family,
holiday,
Papertrey Ink,
stuff i'm makin
Saturday, November 03, 2012
Christmas Cards: Door Wreath
I was playing around with the 2012 Holiday Tag set from Papertrey. I am in love with the wreath in the set. And I decided it needed a door. I've seen some really nice door dies in my travels on the internet but I never bought one. So I had to make my own. Or at least my concept of a door. Anyhow, this is what I came up with using the wreath stamp, some Scarlet Jewel cardstock and patterned paper, as well as the Think Big Favorites #20 (I love the design of this sentiment) all from Papertrey Ink. Oh yeah - I decided to cut a hole in the stamped wreath image so I used a circle Nestabilities.Oops forgot the sentiment is stamped on the PTI Christmas Label die. Such a pretty shape dontcha think?
Hoping you have a fun Saturday! Thanks for stopping by.
Friday, November 02, 2012
You Are Just 2 Sweet - Thank You
I needed a thank you card for a friend and made an attempt yesterday - an hour later, sewing machine taken apart... I had to stop. So today - new day - try another card idea and no sewing machine (i'll have to deal with mine later) and I came up with this card. I kinda like it. Sometimes me and mixing patterns don't mix. But Idunno - I do kinda like it. I used PTI's Tagged Sentiments and a StampinUp set Mixed Bunch. I stamped the little flower from Mixed Bunch in both ink and Versamark and I like that combo. The gingham patterned paper is from the Fine Linen patterned paper pack. Oh yes - I did use the Limitless Layers circle collection from PTI to cut out the circle and scalloped circle. Ok ... off to see about some ironing (I know... that's not fun!)
Monday, October 29, 2012
Tags as Gifts
so after seeing Dawn McVey's wonderful tag set (giving tags as a gift... isn't that a great idea?) I had to give it a try. As time is at a premium these days I thought I might be able to do this quickly - and I did! I did have to overcome the lack of the wonderful Essential Pillow Box die (which is going on my wish list - it would be so handy to have!) by finding a template online.
My pic isn't great but you get the idea. I cut out the template, and used some patterned paper from PTI as well as the 2012 Holiday Tag set. I cut out a few ovals and the scalloped ovals so I could use them on the pillowbox as well as the tags. I stamped the ovals with the image from the Holiday Tag set. Then I assembled the box, wrapped the patterned paper around the box like a belly band and attached the stamped image. Box done.
For the tags I cut out a few of PTI's tag sale #6. Cut some more of the patterned paper and some coordinating cardstock and attached those to the tags. I stamped the "peace love joy" as well as the little design image in a matching color ink and all I had to do was glue on tag reinforcer (that comes with the tag die) and I was done.
Really a very quick little project and sooo cute!
I want so much to have a little more time to make MORE tags. Right now I need to run along. Thanks for looking and if you're in the path of Hurricane Sandy (the winds are ripping outside and I'm hoping we keep our power on....) stay safe.
Sunday, October 21, 2012
It's October and I've made a Christmas card!
I know.. it's absolutely shocking. But given the way things are goin round here I thought I'd better try to start as soon as possible. And believe it or not this card took 10 minutes. I know. Another shocker. I may actually be getting good at this. Reminds me when I was in school in drawing class and we'd have a model and the drawings were timed. 5 minutes... change pose. 5 minutes... another pose. But drawing and card making are quite different LOL. So on with the card. I wish I could recall whose card I saw where they were stamping off using this same set: Mistletoe & Holly from Papertrey Ink. I just can't for the life of me remember whose card I saw but it stuck with me. I do like the effect stamping off gives and I think it can give some nice depth. But in the end I actually decided to use two colors for the holly leaves LOL! Then stamped the sentiment (which is from Happiest Of Holidays - also Papertrey Ink) and the leaves. And voila.. card done. I think I'm going to make a few of these :-)
Thursday, October 18, 2012
Fastest card I've ever made
Wednesday, October 17, 2012
You can't have enough candy corn
Have a good one!
Tuesday, October 09, 2012
Having Cards on Hand
I was quickly writing a Thank You to someone who helped me out today and I thought I'm gonna take a pic of this card (before I send it out the door). I don't think I posted it before - using some Papertrey Ink stamps. But it got me thinking. You know I just love making cards - it just makes me happy ya know? I love the whole thing - the stamps, the inks, the paper and cardstock. But a wonderful bonus is that you get to send these little creations out into the world and hopefully brighten someone elses day. You share what you make. In the case today - well I was dealing with some issues for my Mom and the person on the other end of the phone was such a delight - with a couple of quick moves on her part she made my afternoon turn around. For her it was a simple thing - but to me it made my life so much easier - I'm sure you've all had this kind of experience. Anyhow I thought I'm gonna send this woman, whom I probably will never ever meet, a thank you card to let her know her small gesture was a big deal to me. I'm hoping the card will brighten her day :-) Just sending it is making me feel very happy. Have a good one!
Saturday, October 06, 2012
An Anniversary Card
Pausing the Halloween action for today - and posting an anniversary card.
Mine.
For my husband of 28 years.
Where did the time go?
I used all Papertrey products (Love & Marriage stamp set; Fine Linen Patterned Paper pack; ClassicKraft and True Black Inks).
Okay - that's all for now. Thanks for stopping by!
Mine.
For my husband of 28 years.
Where did the time go?
I used all Papertrey products (Love & Marriage stamp set; Fine Linen Patterned Paper pack; ClassicKraft and True Black Inks).
Okay - that's all for now. Thanks for stopping by!
Saturday, September 29, 2012
My Favorite Vegetable
Candy Corn. I love it. I know it's just a sugar extravaganza... I love it anyway. As much as I just plain think its yummy (when fresh of course - cos no one wants to eat stale candy corn) it's very nostalgic for me as well. (Watch out-this is going to be one of those "I hiked 10 miles in the snow to get to school" moments) When I was a kid Halloween was different. People made things like caramel popcorn balls and candy/caramel apples to give out to trick-or-treaters. We'd make up Halloween bags and fill them with candy to give out. I remember many a Halloween afternoon stuffing bags with candy to hand out.
![]() |
| Vintage Trick or Treat Bags |
Some houses gave out full size candy bars instead (they were enormous!) - and
even if you got the "snack size" they were 2 or 3 times the size of the
ones you buy now. Oh and the actual "trick-or-treating" itself went on for hours. We'd take a pillowcase and go from house to house to house gathering ridiculous amounts of candy. Oh and parents didn't need to go along. Ah. those were the days. Nowadays - well its just different. I think my kids would say they had wonderful Halloweens - filled with homemade costumes, pumpkin carving, and endless candy gathering.... but for me it just wasn't the same. Ok, I'm done now LOL
Onto the card - my wonderful friend June gave me the "My Favorite Vegetable is Candy Corn" stamp for my birthday a few weeks ago. Isn't it just the cutest stamp? I wanted to make her a Thank You card but I really wanted to use the stamp to show her how much I loved it (and her). The vampire is from PTI's Tremendous Treats: Halloween set. I made the background paper using the candy corn stamp from the same set and coloring it in with Copic and Zig Markers. The tag is a PTI die - Tag Sale #1. Okay - I gotta get moving on the day. Hope you have a good one!
Labels:
friends,
holiday,
Memories,
Papertrey Ink,
stuff i'm makin
Wednesday, September 26, 2012
More Halloween!
Tuesday, September 25, 2012
Halloween cards
I've been busy. Obviously ... no posts in a month. But this past weekend I got the chance to make some Halloween cards! Yay... so fun. So thought I'd take a quick minute and share one today. Isn't that cat the cutest? And he's a dead ringer for my younger boy cat, Westley. Seriously. He looks just like this stamp from Papertrey! All the supplies are PTI (well cept the embroidery floss) oh yeah - i colored the cat using Prismacolor pencils.
Ok - gotta run - hopefully i'll be posting more cards over the next few days. Thanks for stopping by ~
Monday, August 27, 2012
More with Mr. Bones
Thought I'd post another card I made with Papertrey's Mr. Bones stamp set. Isn't he the cutest juggler you've ever seen? I used the coordinating die set as well as the Take Three Die to cut out that rounded edge square at the bottom. Hope you're having a great day!
Sunday, August 26, 2012
It was a dark and stormy Sunday
yes, I'm back. I've really been here, wanting to post but too many other things going on. And today, since it is indeed a dark and stormy day, and having gotten a few things off my list for the weekend, I decided to make some cards and post here - YAY!
In the last few weeks there's been work and a nice weeklong vacation to the beach house. And since then, when I've had a few minutes, I was scrapping our vacation. I've been using divided page protectors for a few years now (WeRMemory Keepers and Project Life) - and it really makes it easy and fun. I still have a boat load of scrapbooking to do but I'd say the last two years I've gotten in books right away so not too bad. (we shan't discuss the other 25 plus years of photos still in boxes - less several books on my kids... its a never ending project but I do love it so!)
Ok - so on to the cards - which came together in no time at all - thanks to stamps from my two favorite-ist stamp companies: Purple Onion Designs and Papertrey Ink! The large background like stamp is one of the Noteblock stamps from Purple Onion Designs. And that skeleton, spider web and the cute little spider are from the Mr. Bones set from Papertrey. (Mr. Bones was cut out using the coordinating die set). I added a little hand drawn little line from the web to the spider. I had cut out 4 of the little Mr. Bones, stamped them, and just sat back and smiled - he is just so darned cute!
I'll be posting a lot of Halloween cards in the next few weeks - can't start too early for all the fun fall holidays right? Hope you're enjoying the day - have a good one!
In the last few weeks there's been work and a nice weeklong vacation to the beach house. And since then, when I've had a few minutes, I was scrapping our vacation. I've been using divided page protectors for a few years now (WeRMemory Keepers and Project Life) - and it really makes it easy and fun. I still have a boat load of scrapbooking to do but I'd say the last two years I've gotten in books right away so not too bad. (we shan't discuss the other 25 plus years of photos still in boxes - less several books on my kids... its a never ending project but I do love it so!)
Ok - so on to the cards - which came together in no time at all - thanks to stamps from my two favorite-ist stamp companies: Purple Onion Designs and Papertrey Ink! The large background like stamp is one of the Noteblock stamps from Purple Onion Designs. And that skeleton, spider web and the cute little spider are from the Mr. Bones set from Papertrey. (Mr. Bones was cut out using the coordinating die set). I added a little hand drawn little line from the web to the spider. I had cut out 4 of the little Mr. Bones, stamped them, and just sat back and smiled - he is just so darned cute!
I'll be posting a lot of Halloween cards in the next few weeks - can't start too early for all the fun fall holidays right? Hope you're enjoying the day - have a good one!
Labels:
holiday,
Papertrey Ink,
Purple Onion Designs,
stuff i'm makin
Wednesday, July 18, 2012
Another birthday card
yes another birthday card - for a dear male family friend. I do make other kinds of cards but I do send a lot of birthday cards! And I know I am stuck on this one image - that "sending Birthday wishes" there in the center (from Papertrey's 2012 Birthday Tags set - it's just so pretty! And admittedly very generic and versatile right?) -I'm definitely getting my money's worth out of this set. I also used the Mat Stack 5 collection as well as the coordinating dies, Limitless Layers oval and Half & Half dies. The patterned paper is from the Fine Linen paper pack - also all from Papertrey.
I made a few more birthday cards yesterday - and I've been preparing for our beach vacation coming up beginning this weekend. I cannot describe how much I need this vacation! I've downloaded some books and I've got a book waiting for me at the beach house (one of my sisters-in-law is leaving it for me - she's a peach!) and I shall be a fixture on that wonderful stretch of sand with my Nook! I hope you all have a wonderful week!
Saturday, July 14, 2012
It kinda looks like a quilt
do you agree?
I'd wanted to play with my Papertrey Happy Hexagons and Coverplate: Hexagon die over the last few days. I'd had a little trouble using the die itself with my Big Shot but once I pulled out my old reliable Cuttlebug - I didn't have a problem. Once I got that die cutting problem worked out I was off and running.
The stamps and die make me think of quilts - specifically a quilt my grandmother made - it was one of those yoyo style quilts -gorgeous and completely handsewn. Regardless - quilts have fascinated me for years. I've drawn them so I figure a paper quilt would be fun to try.
I stamped with a navy blue ink on Fine Linen cardstock then cut off a few rows and mounted that (with some foam tape) on a cardbase of Fine Linen. Then I cut out the die using white cardstock and added a few rows to the top of the card - and stamped on those white hexagons using another stamp from the Happy Hexagon set. Finally I stamped one of the sentiments from the set onto a diecut banner. I really like the white against the Fine Linen - it kinda crisps the whole thing up - kind like white sheets on a bed withh a pretty quilt topping it off. Okay - thats' all for today - hope you have a good one!
I'd wanted to play with my Papertrey Happy Hexagons and Coverplate: Hexagon die over the last few days. I'd had a little trouble using the die itself with my Big Shot but once I pulled out my old reliable Cuttlebug - I didn't have a problem. Once I got that die cutting problem worked out I was off and running.
The stamps and die make me think of quilts - specifically a quilt my grandmother made - it was one of those yoyo style quilts -gorgeous and completely handsewn. Regardless - quilts have fascinated me for years. I've drawn them so I figure a paper quilt would be fun to try.
I stamped with a navy blue ink on Fine Linen cardstock then cut off a few rows and mounted that (with some foam tape) on a cardbase of Fine Linen. Then I cut out the die using white cardstock and added a few rows to the top of the card - and stamped on those white hexagons using another stamp from the Happy Hexagon set. Finally I stamped one of the sentiments from the set onto a diecut banner. I really like the white against the Fine Linen - it kinda crisps the whole thing up - kind like white sheets on a bed withh a pretty quilt topping it off. Okay - thats' all for today - hope you have a good one!
Friday, July 13, 2012
I like bright happy colors but....
find myself using a lot of the same, monochromatic color schemes in my card making (and my clothes come to think of it ... hmmm.... well I guess that makes sense huh? but i digress ;-)) As I was thinking about this - I also needed to make a few "hello-how-are-you-I'm-thinking-about-you" kinda cards for a few Aunts that are special to me. So I thought let's get out the colors and make somethin pretty and cheery for them. I pulled out Papertrey Ink's Stitches and Swirls stamp set which I thought would work nicely and found inspiration on Nichole Heady's blog (which is probably the most ridiculously inspiring place to visit as far as stamping goes... if you can't get some ideas there well ... I don't think your eyes are looking at your computer screen k?) I also pulled out the Fillable Frames Sentiments set, and the Fillable Frames #9 die (cute little tag die that coordinates with the sentiments set). I like how they turned out and I definitely fit the "cheery" bill I was goin for.
On another note - I've been busy with this and that - work, home stuff, and I'm working on getting a recent pile of pics scrapbooked so not so much cardmaking going on. I do have one other card I made I'll be back with tomorrow.
Oh one final thing - anyone have any good books they've read lately? I'm heading to the beach in a week :-) and need to fill up the Nook....
On another note - I've been busy with this and that - work, home stuff, and I'm working on getting a recent pile of pics scrapbooked so not so much cardmaking going on. I do have one other card I made I'll be back with tomorrow.
Oh one final thing - anyone have any good books they've read lately? I'm heading to the beach in a week :-) and need to fill up the Nook....
Saturday, July 07, 2012
Make it Monday #73 Round 2
I intended to get back here yesterday but... best laid plans and all. I don't know about where you live, but here in Northern Virginia, it's hot. Prediction for today is 102. I've had about enough. And apparently we will get a break in this non-stop heat fest come Monday. In the meantime we're going to have to think cool thoughts ;-) On to the card (thank goodness right?) I needed a card for a male friend and I like the combo of blue and Fine Linen. I used some Fine Linen patterned papers, the Super Stars Border die, Limitless Layers Ovals die, and Half & Half die. I stamped the sentiment (from Tagged Sentiments set) on the patterned paper with some Night of Navy ink (StampinUp) and I wasn't liking the strength of the color - it wasn't dark enough. I tried a few other times and realized that was as dark as I was going to get it. I didn't want to use black as my cardstock (Enchanted Evening) was blue. So what to do? I took the piece of cardstock and covered it in Versamark then clear embossed it - it pumps the color up just a bit and I liked how it came out. It can be a little hard on the fingers heat embossing a piece of cardstock that is completely covered in embossing powder so here's a little tip for you. I took a scrap strip of cardstock and ran some repositionable adhesive over one half of it. Then I attached that to my EP covered oval - that strip of cardstock becomes a handle to hold your EP covered item. No more burned fingers. If you've figured this out before me - cheers to you! But I've been heat embossing for probably 15 years and this just occurred to me! Ok - I need to get some weeding done before the heat becomes intolerable. Have a good one!
Thursday, July 05, 2012
Make it Monday #73 Stamping on Patterned Paper
I finally had a little time to play around with my stamps and decided to try the Make it Monday. I love these challenges especially when I need to make a card - gives me a bit of a kick start - ya know? So I had some scraps from last week's challenge where I used Papertrey's Giga Guide Lines to make a background. I used the scraps and added some tiny Raspberry Fizz cardstock circles to coordinate with a flower I made using the Bloom Builders #3 die (I cannot wait to make some of these flowers for some fall cards - it looks like a big fat chrysanthemum to me). I also wanted to use that raspberry color as it would also coordinate nicely with the patterned paper (from the Polka Dot Parade paper pack). I stamped a tag (Fillable Frames #9 mini stamp set) and then chose a sentiment from the Fillable Frames sentiment set. I also added a button to the flower with a little embroidery floss.
I managed to make another card for this challenge so I'll be back tomorrow to share that one. Have a good one!
Saturday, June 30, 2012
MIM#72 Step it up - Embellishments/Moxie Fab World Birthday Card Challenge
Sorry I haven't been posting. :-( We went away last weekend to see my nephew graduate. It was a great weekend away just for starters - but seeing him graduate (Summa Cum Laude - I'm just sayin - so proud) was the highlight! When I returned I had to get into birthday mode as both my son and husband's birthdays were this week (son born 5 minutes to his Dad's birthday). We had some nice low key celebrations - which suited us all. I have one of the birthday cards to share today which I made with the MIM challenge in mind. I used Papertrey Ink's Giga Guide Lines stamp set and stamped one of the images in black all over kraft cardstock. This took a bit of time, trying to line up the images - I'm slightly off here and there but overall it went well. Then my little bit of crazy took over because I wanted the pattern orientation to be on an angle (not straight across up and down as I'd stamped it - it was just easier to stamp it that way) - so I had to cut it on on angle (not sure if that's clear - wish I'd thought to take pics as I cut it but there you go LOL). Then I stamped out my embellisment which is the center piece you see here - from Papertrey's 2012 Birthday Tag set. I stamped it on PTI cardstock colors- Kraft, White and Fine Linen - then cut it apart and reassembled it. I used the PTI Limitless Layers Ovals to cut the main oval and the white pinked edge oval - the rest I fussy cut. I know I'm not alone in enjoying some fussy cutting now and again - kinda like therapy isn't it? Finally I decided I needed a little more white in the card. I decided adding some little white circles to the centers of the elements would do the trick - but what could I use to make those white centers? I thought about using a gelly roll white pen - forget it. Then realized maybe just a hole punch? I pulled out my We R Memory Keepers Crop-A-dile - tried both sizes of the punch - and settled on the smaller of the two and punched out a bunch of wee circles and glue penned them on. If I'd had some of those cute little gems handy I guess I coulda used them - but then again this card was for my husband and I don't think he'd be into little sparkly thangs. ;-) (that's my department!)
Anyway I'm hoping to get some card making in this weekend (no I'm definitely going to!) I'm also going to enter this card in the Moxie Fab World Birthday Card challenge because stamping is definitely the primary technique in this card - I love the Giga Guide Lines set for making big bold backgrounds! Thanks for stopping by!
Tuesday, June 19, 2012
MIM: #71 Bordered Sentiments
I've been a little busy and wasn't able to give last week's Make It Monday Challenge a try but this week I was able to give it a go... sorta. I'll explain. The challenge was to mask off your bordered sentiment and then stamp your background. And I did indeed do that - but after some consideration I wasn't liking what I came up with. Here it is before I kinda went off the Make It Monday trail.... and in the photo you can also see I stamped the sentiment again on a piece of white cardstock measured to fit inside my pen borders.
And here's the card when I added that sentiment and then added some stitching. (click on it for a clearer look). Yes, I added some fringe. Paper fringe. The other day I was playing around with my Martha fringe scissors and thought it might be kinda fun to add some paper fringe to a card. I'd earlier been playing with the Background Basics: Medallions set from Papertrey and thought what I came up with looked a little like bandanna fabric - do you agree? Well I thought they'd make a cute combo - and when I saw the MIM I thought why not give that a try. I spose I really should give the challenge another try - but for this particular card I think I needed that sentiment stamped on white. I do like the line I drew in bordering the white. It accentuates the white just right.
Now while I was at it I decided to try another card with some more faux Bandanna fabric :-) I had a sentiment I'd stamped out on kraft cardstock - Happy Birthday. I stamped some more with the BB:Medallions - put those two together on a darker blue background. Then I made a little more paper fringe - but it needed something else. I looked around on my drawing table and I saw a piece of red cardstock that I used to cut out the Superstar Border Die from Papertrey - it was the negative of the stars, if you will. I liked the red with the fringe - stitched it all up and this card was done.
Okay - I need to get some dinner on the table for this family. Have a good one!
And here's the card when I added that sentiment and then added some stitching. (click on it for a clearer look). Yes, I added some fringe. Paper fringe. The other day I was playing around with my Martha fringe scissors and thought it might be kinda fun to add some paper fringe to a card. I'd earlier been playing with the Background Basics: Medallions set from Papertrey and thought what I came up with looked a little like bandanna fabric - do you agree? Well I thought they'd make a cute combo - and when I saw the MIM I thought why not give that a try. I spose I really should give the challenge another try - but for this particular card I think I needed that sentiment stamped on white. I do like the line I drew in bordering the white. It accentuates the white just right.
Now while I was at it I decided to try another card with some more faux Bandanna fabric :-) I had a sentiment I'd stamped out on kraft cardstock - Happy Birthday. I stamped some more with the BB:Medallions - put those two together on a darker blue background. Then I made a little more paper fringe - but it needed something else. I looked around on my drawing table and I saw a piece of red cardstock that I used to cut out the Superstar Border Die from Papertrey - it was the negative of the stars, if you will. I liked the red with the fringe - stitched it all up and this card was done.
Okay - I need to get some dinner on the table for this family. Have a good one!
Sunday, June 17, 2012
Happy Father's Day
Here's the card I made for my husband. He is quite wonderful and is the world's greatest Dad to our 2 kids. I kinda hit the jackpot when I married him.
I went to look back on this here blog to see what cards I'd made for him in the past (I've been blogging for over 7 years ... I had totally forgotten it had been that long.. but I digress).
Here's a favorite Father's Day card from the past (it's got the three most important people in my world right on it)
http://smallsmackerels.blogspot.com/2007/06/fathers-day.html
Have a good one ~
Saturday, June 09, 2012
Make it Monday #69 - Inspiration into Unique Sketches
I've had this Bon Appetit Magazine (May 2012) sitting on my kitchen table since...well May ;-) Last weekend I was looking at and was struck by the cover and those gorgeous baguettes. I loved the composition of them on the cover and was thinking - that kinda makes me think of a card I could make.... On Monday afternoon after work I go to check Nichole Heady's blog to see what the new Make it Monday is - I love the videos and have been trying to challenge myself a little in my card making lately. Basically it was about taking an inspiration and turning it into a sketch. I'm thinking - hey how is she reading my mind about those baguettes? LOL Although there are some absolutely wonderful sketches provided for the challenge I thought why not take the inspiration to make my own and give it a whirl. So back to those baguettes. What intrigued me the most was the composition - particularly the one baguette - on top of the rest or fourth from the left (it is under the S in Paris). I thought I wanted to see what I could do with this little-out-of-order element. I drew a few sketches - my drawing teachers would wonder what has become of my drawing skills... but I digress ;-) I decided on a twist on that little element (instead of it being out of order I'd put it at the top - near the sentiment) and here's my card. I used My Minds Eye Lost & Found paper, the Double-Ended Banner die and Think Big Favorites #12 sentiment from Papertrey Ink. And I did a little stitching around... Okay blogger is not being cooperative so I'm going to stop fooling around with this post. Thanks for stopping by - have a good one!
Thursday, June 07, 2012
Queen for a Day - Simon Says Stamp Challenge
I decided to try the challenge over at the Simon Says Stamp Challenge blog (be Patriotic, Celebrate the Diamond Jubilee, add Crowns and/or Gems). I went with a birthday card - Queen for a Day! I poked around in my stash and found a deck of cards and selected the Queen of Diamonds. The celebrate sentiment is from Papertrey Ink's Celebrations stamp set. The smaller sentiment is one I printed on my computer onto a diecut (you knew there had to be one didn't you? The Double-Ended Banner die from Papertrey). The background patterned paper is from my stash - it's from Li'l Davis Designs (who apparently are now part of Fiskars). I used some Antique Linen Distress ink on the sentiments to age them a little - using a stippling brush. I'm kinda pleased with the card - sortofa clean and simple vintage card ;-)
Have a good one!
Have a good one!
Monday, June 04, 2012
84th Birthday
My father-in-law will be celebrating his 84th birthday this week and I needed to get a card made so I could put it in the mail tomorrow. Fortunately it came together pretty quickly and I think he'll like it :-) That's all for today! Have a good one~
Cardstock: PTI Kraft & Aqua Mist
Stamps: Background Basics: Woodgrain, Movers & Shakers Sentiments; StampinUp! Stippled Shells (retired)
Ink: PTI Kraft and Aqua Mist; Stampin Up! Craft White
Die: PTI Mat Stack 1
Ribbon - from my stash
Sunday, June 03, 2012
Make It Monday #68 Pocket Cards
Friday, June 01, 2012
Tag-a-lot
On the next two tags I used the Tiny Treats: Birthday set. There are so many cute little images to choose from but today that little bee caught my eye. I used a Copic marker as well as a Prismacolor pencil with a little sparkly Gelly Roll pen (for the wings) to color him in. And those polka dots? I had some Smash tape sitting on my desk and I thought it would go very nicely.
Okay that's all from me - have a good one!
Labels:
family,
in the 'berg,
Papertrey Ink,
stuff i'm makin
Subscribe to:
Posts (Atom)