
I love to draw and color. And I've been doing that a lot lately - especially with Kathy Racoosin's 30 Day Coloring Challenges (if you don't know about these - please get yourself on over to Kathy's blog and do a search pronto!). And it's been so much fun. While the challenge was going on - and I wasn't drawing something to color or using some stamps to color - I discovered something. I have a LOT of stamps I cannot color. The horror! I have a lot of stamps and the vast majority are solid image stamps. Meaning there are no lines - you stamp a solid color. Now of course some of them are 2 step stamping sets that add wonderful dimension but, in short, there are no lines. I thought I wish I could use some of these stamps in the challenge.... but how? They aren't the kind of stamps you can color in with markers, pencils, or watercolors. Then I had an idea. I'm sure someone else has had this idea but I haven't seen it anywhere. It's actually kind of the opposite of the "no-line coloring" that's so popular now - except you're putting in lines. Follow me....
So here's an image from Avery Elle's Petals & Stems on the left. On the right - same stamp!


Crazy right? Completely different look and all from the same stamp!
Okay you want to see another???
This time it's one of my favorite stamp sets - Papertrey Ink's Cutting Garden It's just got the prettiest flowers and leaves! It's a bit more elaborate than the stamp above so let's see what happens with that shall we?

Okay now let's see what it looks like when I want to make it a stamp I can color in with Copics!


Pretty cool huh? It looks completely different doesn't it? Again, I stamped with a Distress Ink (Fine Linen), then used a Copic Friendly pen to trace the petals and colored it with Copic markers. Just for the record my Copic friendly pen for this isn't a Copic - it's a pen I draw with - it's a Pilot G-Tec-C4. Love that pen. But I've used it a ton and it works perfectly well with Copics.
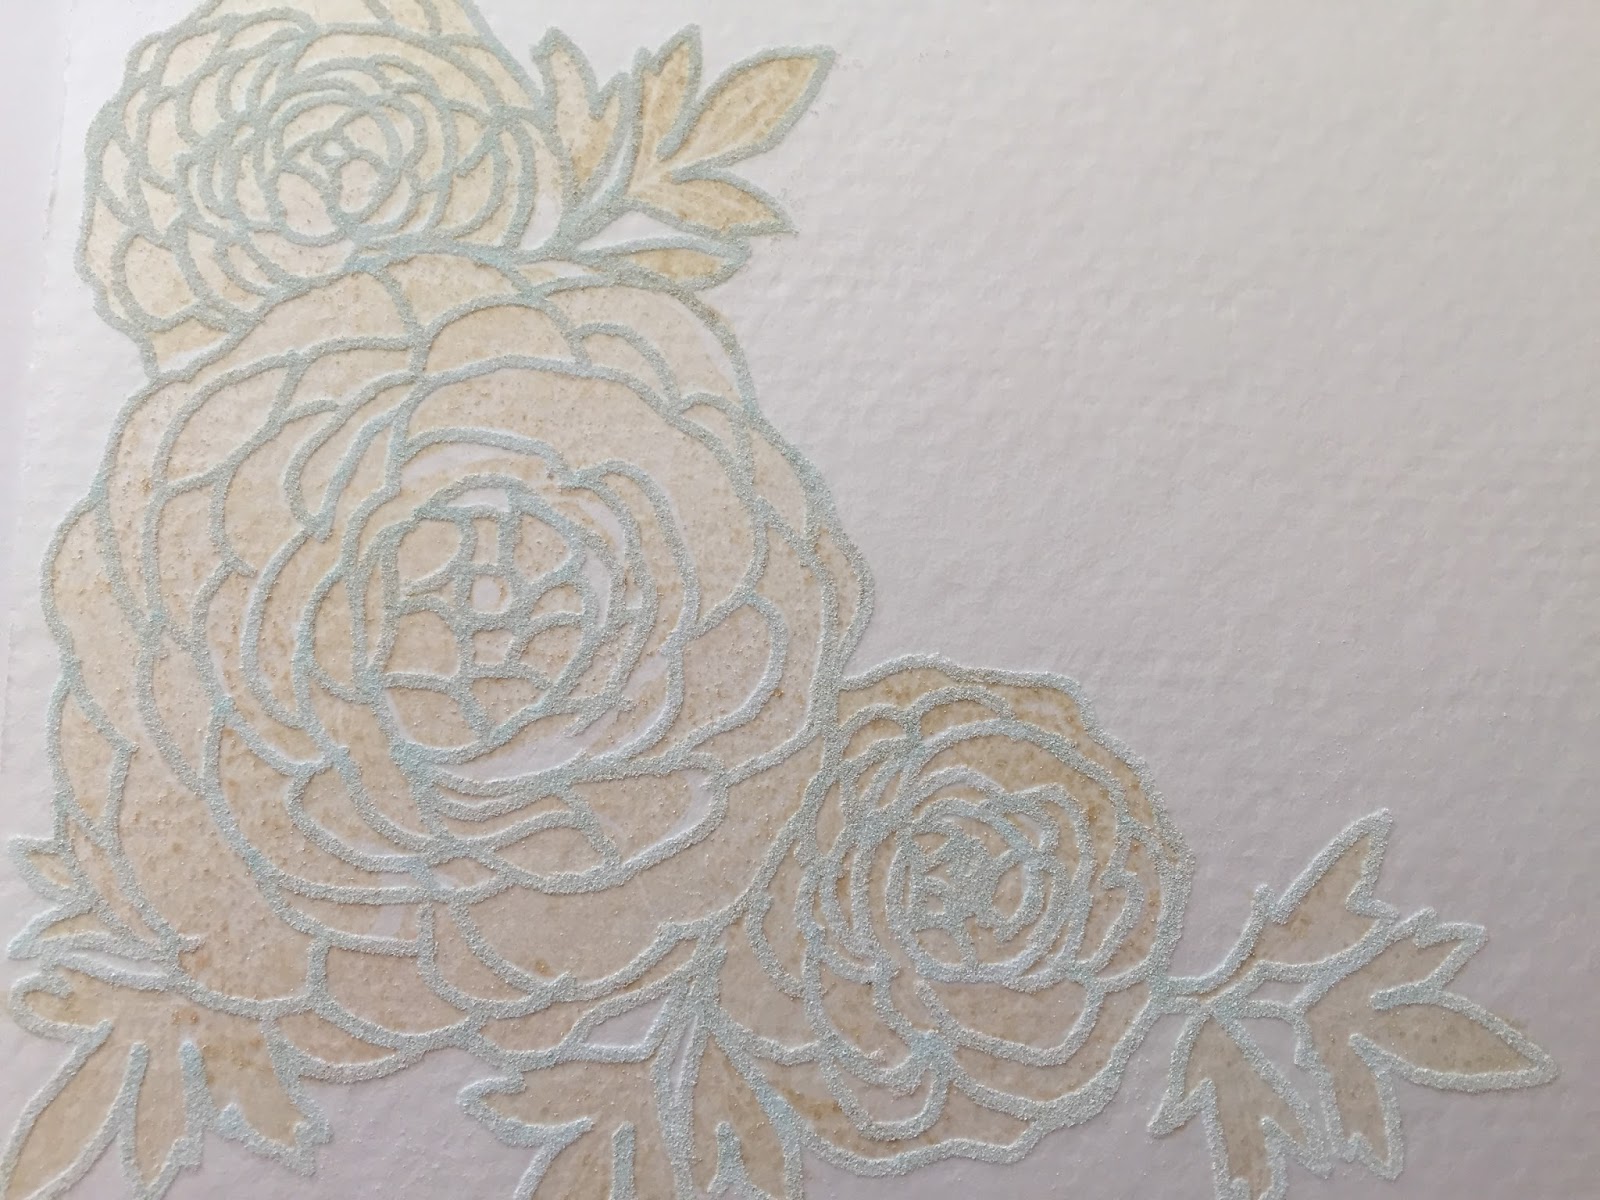
Okay - are you curious about what would happen if you wanted to watercolor using this technique? I'm so glad - I tried that too!
And here's what it looks like colored in Zig Clean Color Markers and embossed with white embossing powder. Kinda pretty. I had to do this a little differently - using a Zig Embossing Pen - which I don't think are available anymore. It's basically the same as a Versamark pen (I couldn't find mine). You draw with the embossing pen over those lines in the stamp then add embossing powder, heat with your heat gun and go ahead and color. I did try with clear embossing powder - it works nicely. I'm not showing a sample here because again I had to use the Embossing pen - and that ink has a blue tint to it - and that blue tint stays trapped under the clear and you get pale blue lines - here with the white embossing powder you see none of that.
Just so you can see what it all looks like before I added color to the images here's a few pics I took while I was trying all of this out.

When I started with this I pulled out a few stamp sets. This rose is from Papertrey Ink's Rosie Posey. I stamped the rose in Fine Linen Distress Ink and then added the pen. I'll don't have a pic of the colored rose. I was going to watercolor this rose - stamped it - then inked with my Pilot pen - should've used my Pitt Pen which is waterproof - so you know how that went. I had the black ink running - ugh. I shall have to go back and try the rose with the Pitt Pen in watercolor because I think it would be pretty beautiful.

And here's the image stamped in Fine Linen Distress Ink, then inked in pen before I colored with Copics. I think besides coloring with Copics I loved this part the best. You really don't have to be someone who draws on a regular basis. You are just pretty much tracing what's there. And you can edit if you like. Say you want fewer petals ... you just draw in the ones you want! I was a little concerned having that much Distress ink in contact with my Copics. I happen to have a duplicate of one Ciao marker - so I tried with that first - thinking if it got ruined I always had the other pen. I swear it did not damage my pen.
So what do you think? I think I can now get a lot more life out of the stamps sets I own - and that's an amazing thing! And when I purchase solid stamp sets in the future I've got another technique in my arsenal to color them any way I'd like. Yay!
Okay that's quite enough for today right? I'll close saying that Kathy Racoosin is hosting another Coloring Challenge in either September or October - and if you love to color - you need to join in the fun! And please come over to Instagram, if you haven't already, follow me there - say hi okay? I really would love to know what you thought about today's post - can you comment below please? Thanks so much for stopping by!
4 comments:
Love it!! Thanks for giving me another way to use my stamps.... And another excuse to buy more floral sets that I didn't because I couldn't color them.... Teehee!!
Pretty impressive Tracy. You're definitely on to something here. I'm going to look at my solid stamps in a completely different Way. I'm all for getting the most out of every stamp I own and finding new and creative ways to use them. Thank you for this great demo. ~Maggie
WOW - what a great 'reverse' technique to extend our stamps!!! Thanks so much, and I am so glad you experimented so successfully!
Blessings
Maxine
Fantastic...so much work, but completely new looks. These are all beautiful, Tracy!
Post a Comment