Wednesday, May 30, 2012
Father's Day Cards
Tuesday, May 29, 2012
Sunday, May 27, 2012
Make it Monday #67 Mixing Patterned Papers
Oh I just checked and if you click on the pic of the card you'll see a nice clear image - yay!
Friday, May 25, 2012
PTI Blog hop for May
I wanted to participate in this month's blog hop. The challenge was to pair green with bold black and white patterns. Ok... so no real patterns here LOL. I did play around with some and as I'm running out of time this will have to suffice. Now that isn't to say I don't like what I came up with - I really am happy with it. I wanted to try out using my new Notched Flowers Die Collection. And I haven't used this sentiment - from Flower Fusion #12. But I have used that little flower from the Mat Stack #5 collection and I love it here. Also - it's hard to see but I dry embossed some lines around the sentiment. Ok I have to run. Thanks for looking
Thursday, May 24, 2012
For You (Year of Flowers)
I wish these photos were better but .... I wanted to make a few cards with the Garden Variety II set from Papertrey Ink - along with the Year of Flowers Collection set. May's flower is Lilies of the Valley and we know how much I love the larger version of that stamp. I used the Seed Packet Frame 2 die and stamped it then used the Year of Flowers Titles Mini Stamp set to stamp in the "Lilies of the Valley" at the top. I used some Anna Griffin patterned paper I still have along with some cardstock I embossed with the swiss dot embossing folder from Cuttlebug. I searched around and found a wee label from Making Memories that I could stamp with "for you". Now I know you can see some black ribbon and some polka dotted ribbon but you cannot see some Smash tape (black polka dot) that's there too - but you can see it in the next card. And finally I used some Copic markers to color in the image of the flowers.
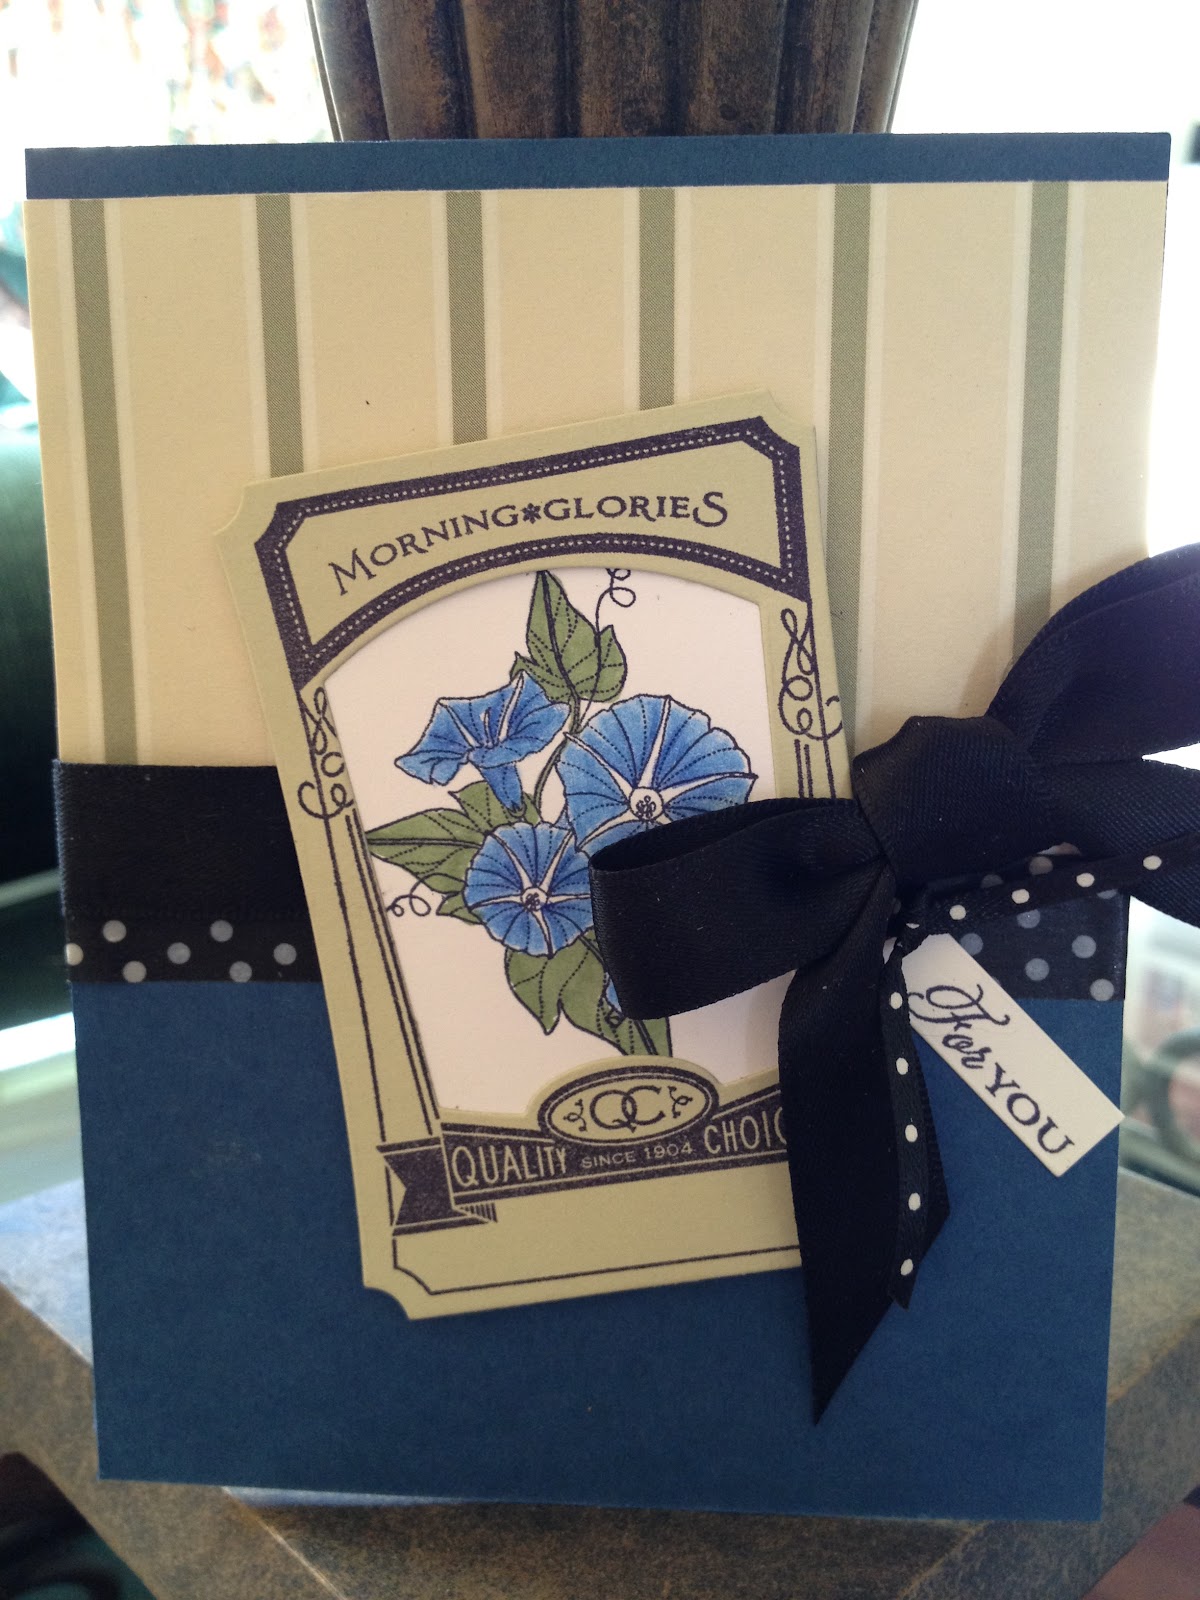
Now on to card number two. This also uses some Anna Griffin paper and the same Seed Packet Frame 2 die. This time I took the title and kinda bent the stamp so the title "Morning Glories" follows the line of the seed packet frame. I used the same ribbons and that Smash tape as well as another little tag. The flower image was colored using Prismacolor pencils - for the leaves I used some Copic markers.
I'll wrap up here saying that I have such a hard time tying those pretty bows (and they certainly don't survive an envelope well) - but they're so pretty it can be worth the effort every one in a while LOL
have a good one!
Tuesday, May 22, 2012
another Grad card
this one came together very quickly - I embossed the Mat Stack #1 die shape with a Cuttlebug Swiss Dot embossing folder. The image and sentiment are from PTI's For the Graduate stamp set. And I also used the Limitless Layers Circle Die Collection for the center die cut and the black layer underneath it. A simple but elegant graduation card.
Today I worked on some Father's Day cards I'll probably post tomorrow. Have a good one!
Monday, May 21, 2012
Graduation Cards
It's that time of year - Graduations going on everywhere. I made a few cards from a retired StampinUp! set.
I like the red/black combo and they're the colors for one of our local high schools
I even cracked out the Stampamajig for this one - that background text stamp is maybe 2x2.
For the second card I also used Papertrey Ink's By the Numbers dies.
I'll definitely be making a few more graduation cards in the next few weeks - and I'll be trying out a new Papertrey Ink graduation set I just received - it's nice to have a little creative variety right?
okay I'm off to see what I can make! Have a good afternoon ~
Wednesday, May 16, 2012
Let's get together for coffee
Sunday, May 13, 2012
Happy Birthday Princess
I've been waiting for several months to make this card LOL and today I finally got my chance. It's Mother's Day - Happy Mother's Day to you all - and so I'm a lady of leisure today. (I hope you are too.)
So as I said I've been waiting to make this card - just other cards to make, things to do, blah blah. But today had to be the day because my sweet-pink-and-princess-anything-that-sparkles-loving-almost-4-year-old niece's birthday is next Sunday and I've got to get her gifts (and card!) in the mail. This is the youngest of all my many nieces and nephews and my sister's child. She is a special kid and deserves a special (pink-of-course) card. I hate to admit it but I bought the stamp set I used - Papertrey Ink Tiny Treats: Birthday primarily because I wanted that adorable little princess image (and in fact I have used the set for other cards already - so it's worked out quite nicely). And when deciding to purchase that set it was this card by Dawn McVey that sent me over the edge. All the little "2"'s - well and that adorable monkey - but the 2's stuck in my head and I thought I'd have to use that for this card - but using 4's ;-) .... which necessitated the purchase of the By the Numbers dies.... LOL. Okay so I used some Copics and Stampin Write markers as well as a Gelly Roll Clear Glitter pen for the little image. Other dies: the Limitless Layers Circles and the Mat Stack 5 and Mat Stack 5 Layerz. Oh yes - and the Swiss Dot Embossing folder from Cuttlebug. I should mention that I sort of edited the sentiment. I bent the Happy Birthday part so it was rounded/arc'd...?... and I just inked up the word Princess (the stamp actually says Princess Wishes).
All for now - enjoy your Mother's Day!
So as I said I've been waiting to make this card - just other cards to make, things to do, blah blah. But today had to be the day because my sweet-pink-and-princess-anything-that-sparkles-loving-almost-4-year-old niece's birthday is next Sunday and I've got to get her gifts (and card!) in the mail. This is the youngest of all my many nieces and nephews and my sister's child. She is a special kid and deserves a special (pink-of-course) card. I hate to admit it but I bought the stamp set I used - Papertrey Ink Tiny Treats: Birthday primarily because I wanted that adorable little princess image (and in fact I have used the set for other cards already - so it's worked out quite nicely). And when deciding to purchase that set it was this card by Dawn McVey that sent me over the edge. All the little "2"'s - well and that adorable monkey - but the 2's stuck in my head and I thought I'd have to use that for this card - but using 4's ;-) .... which necessitated the purchase of the By the Numbers dies.... LOL. Okay so I used some Copics and Stampin Write markers as well as a Gelly Roll Clear Glitter pen for the little image. Other dies: the Limitless Layers Circles and the Mat Stack 5 and Mat Stack 5 Layerz. Oh yes - and the Swiss Dot Embossing folder from Cuttlebug. I should mention that I sort of edited the sentiment. I bent the Happy Birthday part so it was rounded/arc'd...?... and I just inked up the word Princess (the stamp actually says Princess Wishes).
All for now - enjoy your Mother's Day!
Saturday, May 12, 2012
Make it Monday #65 - Shabby Strawberry Card
okay so the challenge was to use patterned paper scraps to create a background. Originally i wasn't going to do this challenge - although I loved the wonderful video and I loved the card that was created for inspiration. I just have been playing with stamps in some stolen moments and had a few cards to make that I just needed to get done. I looked down at my drawing table and I discovered I had all kinds of patterns floating around LOL - now they weren't patterned paper scraps per se. They were pieces of stamped images - mostly background stamps. I thought well HEY... I'm gonna give this a try! And a card was born :-) I used all stamps from Papertrey Ink: Strawberry Patch, Polka Dot Basics, BB: Tintypes, BB: Gingham. The sentiment is a partial stamping of a sentiment from the Celebrations set. I used my circle Nestabilites and accompanying scallop circle, as well as the Papertrey Double-Ended Banner die. I found a button and threw that into the mix. And I did a little stitching on my machine. Oh and the strawberry image is stamped but the background around it is colored with a Copic marker. I am so glad I gave that a try - I really like all the patterns together! Now off to go out to dinner with my family for Mother's Day (the husband has to go out of town tomorrow afternoon so we're doing our little celebration this evening). Have a good nite!
Wednesday, May 09, 2012
Strawberry card
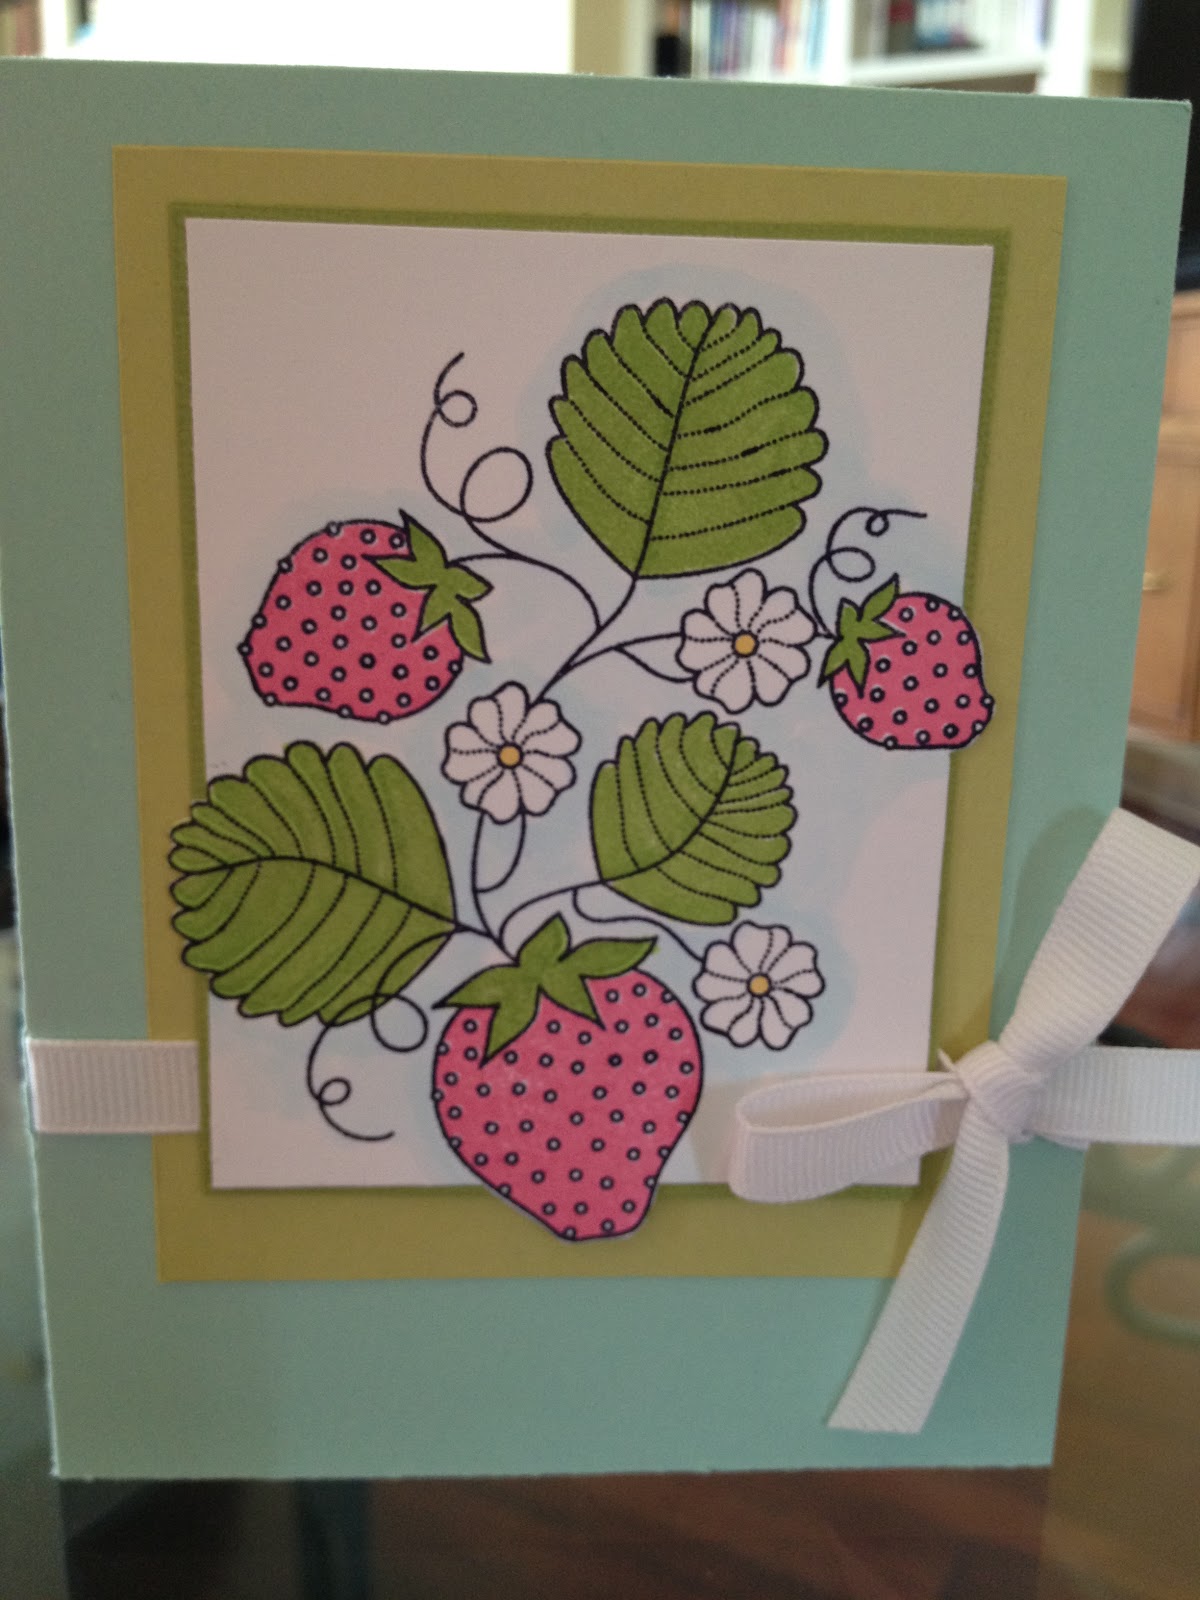
A card I made today using a set from Papertrey Ink called Strawberry Patch - I have to say right away this was the most fun and quickest stamping session I've probably ever had. Why? Well it's just the best designed set - you get both outlines and solid images for 2 step stamping so however you want to stamp with it - you're covered :-) And it's so easy to line up the images - it was a breeze to get wonderful results. Hence - happy stamping :-). I used ink pads and some Copics and actually stamped 4 sets of images in no time.
I am hoping to put together the other 3 cards tomorrow - with a few variations (I've got gingham in mind to pair with these cute strawberries). Have a good one!
Wednesday, May 02, 2012
Birthday Wishes
Some more birthday cards:
these using Papertrey Ink's Think Big Favorites #7 sentiment stamp set. I love that big bold "Birthday". The patterned paper is from a discontinuted 6x6 paper pad from Basic Grey Nook & Pantry . The paper matched the PTI Fine Linen cardstock so perfectly. And the stamped design on the bottom of the left card was stamped using PTI's Giga Guidelines. The designs in the BG paper were so similar to the stamps I had to give it a try.
After assembling I thought stitching was in order.
here's a couple of closeups on the cards.
Okay that's all from me for today - have a good one!
these using Papertrey Ink's Think Big Favorites #7 sentiment stamp set. I love that big bold "Birthday". The patterned paper is from a discontinuted 6x6 paper pad from Basic Grey Nook & Pantry . The paper matched the PTI Fine Linen cardstock so perfectly. And the stamped design on the bottom of the left card was stamped using PTI's Giga Guidelines. The designs in the BG paper were so similar to the stamps I had to give it a try.
After assembling I thought stitching was in order.
here's a couple of closeups on the cards.
Okay that's all from me for today - have a good one!
Sunday, April 29, 2012
Pink & Green Day
it's a pink and green day here in the burg... or rather in my house (in the burg). Even though I would tell you my favorite color is blue, it seems that green shows up in a heck of a lot of cards for me. I had a couple of birthday cards to make for the coming week and the first thing I reached for was the green cardstock. Then the pink. (and anyone who knows me knooooooows I'm not a pink girl. well, I never used to be and ya see it's also a color I seem to be drawn to more lately. go fig)
I actually scanned this card in, then ripped off the oval, pulled out my sewing machine, stitched the gingham portion, then put the oval back and quick snapped a photo. phew! The scan looked prettier but the stitching really finished off the card - so there. I used Papertrey Ink's 2012 Birthday Tags as well as Background Basics: Gingham and finally, the Polka Dots Basic stamp sets. The white scallop and the oval were cut with the Limitless Layers 2-1/4" Oval Dies.
For my second birthday card I used the same 2012 Birthday tags set as well as the oval dies, some Basic Grey paper as well as the BB: Gingham. I used the Double Ended Banner die in the center there and used a little StampinUp! punch to create that little scallop at the bottom (but I cannot remember what it's called to save my life and I'm sure it's long since retired. Note to self: buy a scallop border die already!)
Okay I believe the troops are pacing outside my door here, wanting to be fed. I am hoping to get more time to make things this week (hopefully I'm almost finished with the workmen invading my home everyday). Have a good one!
I actually scanned this card in, then ripped off the oval, pulled out my sewing machine, stitched the gingham portion, then put the oval back and quick snapped a photo. phew! The scan looked prettier but the stitching really finished off the card - so there. I used Papertrey Ink's 2012 Birthday Tags as well as Background Basics: Gingham and finally, the Polka Dots Basic stamp sets. The white scallop and the oval were cut with the Limitless Layers 2-1/4" Oval Dies.
For my second birthday card I used the same 2012 Birthday tags set as well as the oval dies, some Basic Grey paper as well as the BB: Gingham. I used the Double Ended Banner die in the center there and used a little StampinUp! punch to create that little scallop at the bottom (but I cannot remember what it's called to save my life and I'm sure it's long since retired. Note to self: buy a scallop border die already!)
Okay I believe the troops are pacing outside my door here, wanting to be fed. I am hoping to get more time to make things this week (hopefully I'm almost finished with the workmen invading my home everyday). Have a good one!
Thursday, April 19, 2012
Lily of the Valley Thank you's
I needed a few thank you cards and since it's Spring (well despite a few 80 & 90 degree days) I decided to pull out one of most favorite stamp sets - Papertrey Ink Year of Flowers: Lily of the Valley. It's just the most elegant stamp. And it's really pretty stamped on kraft cardstock and colored with Prismacolors and Copic markers. But it is a large stamp - takes up a lot of real estate on a card front. I decided to fill space at the bottom with two different solutions.
The card on the left has a PTI Double Ended Banner die that I stamped with PTI Background Basics: Gingham in Versamark then stamped the sentiment in black. I cut a strip of the same color cardstock and ran it through the Fiskars crimper.
The card on the right has the sentiment stamped in black onto a an image from the PTI Sweet Spring stamp set. That image was cut out using the PTI Christmas Label die. I used that gingham stamp again and stamped a strip and cut it to fit in the space at the bottom of the card.
Alright - hope it's a great day wherever you are~
The card on the left has a PTI Double Ended Banner die that I stamped with PTI Background Basics: Gingham in Versamark then stamped the sentiment in black. I cut a strip of the same color cardstock and ran it through the Fiskars crimper.
The card on the right has the sentiment stamped in black onto a an image from the PTI Sweet Spring stamp set. That image was cut out using the PTI Christmas Label die. I used that gingham stamp again and stamped a strip and cut it to fit in the space at the bottom of the card.
Alright - hope it's a great day wherever you are~
Monday, April 16, 2012
Celebrate - with a little glitter
Oh and one more thing. That frame die - I wanted another layer underneath the white frame - but there is no die for a larger frame. (I knowwww!) So what to do? I cut the frame again in the lavender (purple - whatever you want to call it) cardstock, then cut it down the middle and offset it under the white. Voila. I like the way it came out along with the crimped band of cardstock (sorta faux ribbon).
Have a good one!
Saturday, April 14, 2012
Hello
Hello there :-)
Back for the 2nd day in a row huh?
Here's a little hello card.
I used the Mat Stack 3 Collection Stamp set as well as the Mat Stack 3 Dies from Papertrey Ink to create that main frame. The flowers are from Papertrey's Year of Flowers which I colored with Prismacolor pencils. The little sentiment is from the Mat Stack 3 stamp set too - such a simple but elegant font. I stamped it on cardstock cut out from PTI's Double Ended Banner die. That banner die actually has two banners on it. I cut one out of white which I stamped on then I cut the larger banner you see under it in Fine Linen cardstock. I inked up that main large frame image and stamped the edge of the larger banner with it - if you look closely you can see the larger banner has that canvas/linen pattern on it. It helps tie it all together - along with that lovely patterned paper (I can't remember the manufacturer - sorry) - which appears to have a linen like texture.
Have a great day!
Back for the 2nd day in a row huh?
Here's a little hello card.
I used the Mat Stack 3 Collection Stamp set as well as the Mat Stack 3 Dies from Papertrey Ink to create that main frame. The flowers are from Papertrey's Year of Flowers which I colored with Prismacolor pencils. The little sentiment is from the Mat Stack 3 stamp set too - such a simple but elegant font. I stamped it on cardstock cut out from PTI's Double Ended Banner die. That banner die actually has two banners on it. I cut one out of white which I stamped on then I cut the larger banner you see under it in Fine Linen cardstock. I inked up that main large frame image and stamped the edge of the larger banner with it - if you look closely you can see the larger banner has that canvas/linen pattern on it. It helps tie it all together - along with that lovely patterned paper (I can't remember the manufacturer - sorry) - which appears to have a linen like texture.
Have a great day!
Friday, April 13, 2012
Leafy Birthday
Hi there.
Been a few days - and I'm getting a little impatient with the construction going on in my house. The floors are done but we still are working on getting a new bannister installed - that should be completed today (it's hard typing with my fingers crossed but I'm doin it anyhow). Then the final staining and I'm thinking the torture will be over next Wednesday. Sigh - I want my house back.
Onward to the leafy card you see to your left. I used Papertrey Ink's Lovely Leaves and the sentiment is from PTI's Think Big Favorites #12. I used the kiss technique using a retired Canvas background stamp from StampinUp!. I'm not sure you'll be able to see that Canvas image kissed onto the leaves - but trust me it's there and it looks pretty - kinda makes each leaf look plaid - very cute!.
I'll have another card tomorrow (really... 2 days in a row!)
Have a good one ~
Been a few days - and I'm getting a little impatient with the construction going on in my house. The floors are done but we still are working on getting a new bannister installed - that should be completed today (it's hard typing with my fingers crossed but I'm doin it anyhow). Then the final staining and I'm thinking the torture will be over next Wednesday. Sigh - I want my house back.
Onward to the leafy card you see to your left. I used Papertrey Ink's Lovely Leaves and the sentiment is from PTI's Think Big Favorites #12. I used the kiss technique using a retired Canvas background stamp from StampinUp!. I'm not sure you'll be able to see that Canvas image kissed onto the leaves - but trust me it's there and it looks pretty - kinda makes each leaf look plaid - very cute!.
I'll have another card tomorrow (really... 2 days in a row!)
Have a good one ~
Friday, April 06, 2012
What goes up and never comes down?
Here's another birthday card. Again, the picture - not so good.
If you could've seen the state of my house you'd understand that I'm lucky I got this picture and the ones to follow. It's major pandemonium in my house with new floors going in and everything is upside down. It's making me a littly loopy but I did have to get a pic of the card. If I didn't take a picture of the stuff I make, I would never remember all the details. And me - I like the details.
So on to the card. This one is for my sister who is celebrating a birthday this weekend. Since she is younger than me I don't think she'll mind the punch line when she slides open the card. I used those Movers & Shakers dies from Papertrey Ink to create the moving element to the card. The sentiment is from the Movers & Shakers Collection. For the backgrounds I used to sets: Flower Fusion #7 (the flowers on pink cardstock) and the Stitches & Swirls set for the backgrounds you see on green and yellow cardstocks.
I wrapped up her gift and sent it along with a little pack of supplies for her to make stuff but it needed a little explanation. The explanation had to be written on something cute hence this stamped piece of cardstock. (explanation on the flip side) Those leaves are from that same Flower Fusion #7 set. I'd been playing around with the stamp on some paper and kinda like how it could make a pretty little pattern. So I stamped it on some cardstock and cut it out with the Top Note die from StampinUp!. I'd cut out some flowers using the die for the Flower Fusion stamp set and glued those down for the To and Love :-) While I was playing around with stamps I stamped out this cute little tag from the PTI 2012 Birthday Tag stamp set. I cut it out with an oval die and decided I'd cut out the scallop mat for it from another piece of cardstock I'd been stamping on - more of those same flowers from Flower Fusion #7 - I kinda like the colored mat - as opposed to a plain white scallop. Anyhow that little tag was attached with a ribbon to the gift itself.
So there you have it. Now I need to get on some more birthday cards and eek - Mother's Day is practically around the corner!
If you could've seen the state of my house you'd understand that I'm lucky I got this picture and the ones to follow. It's major pandemonium in my house with new floors going in and everything is upside down. It's making me a littly loopy but I did have to get a pic of the card. If I didn't take a picture of the stuff I make, I would never remember all the details. And me - I like the details.
So on to the card. This one is for my sister who is celebrating a birthday this weekend. Since she is younger than me I don't think she'll mind the punch line when she slides open the card. I used those Movers & Shakers dies from Papertrey Ink to create the moving element to the card. The sentiment is from the Movers & Shakers Collection. For the backgrounds I used to sets: Flower Fusion #7 (the flowers on pink cardstock) and the Stitches & Swirls set for the backgrounds you see on green and yellow cardstocks.
So there you have it. Now I need to get on some more birthday cards and eek - Mother's Day is practically around the corner!
Labels:
around our house,
family,
Papertrey Ink,
stuff i'm makin
Wednesday, April 04, 2012
a 21st birthday
here's a card I made for a 21st birthday being celebrated today. I can hardly believe it but the calendar doesn't lie.
Anyway I used a number of Papertrey Ink products: the main sentiment is
from the Movers and Shakers Sentiments Collection (as well as that
little "pull here" ... didja see that?); also the Background Basics: Tin
Types. I cut the ovals from my Nestabilities and cut the dies for the
sliding feature of this card using the PTI Movers and Shakers Sliders
Dies.
This is what the card looks like until you pull that little tab - and when you do it looks like this:
The 21 is cut from some Papertrey Number dies.. cute huh?
ok... gotta run!
This is what the card looks like until you pull that little tab - and when you do it looks like this:
The 21 is cut from some Papertrey Number dies.. cute huh?
ok... gotta run!
Sunday, April 01, 2012
fringe fun
Now I have had these Martha Stewart Fringe Scissors for forever. I've used them a few times to create just that - fringe. But I saw a video recently that made me want to try and make these little fun fringed bows. Now aren't these just the cutest things? I had shared the video with my sister - who also likes to make things :-) - and asked her if she'd like some fringe scissors for her birthday. She said "oh yeah".
So I'll be packaging up some tissue paper, doilies, along with a pair of fringe scissors and sending them off this week to my dear little sister so she can be a fringe bow makin fool too!
I made these 3 bows last night in no time - really it takes just a few minutes and its almost foolproof. I used the recommended hot glue and it's been a while since I've glue gunned (translation: a few burned fingers... ) but once I made the first one I was on a roll. Now I need to wrap up some goodies I'm mailing off to my daughter who is celebrating a special birthday this week :-) I'll be back with a few cards soon.
So I'll be packaging up some tissue paper, doilies, along with a pair of fringe scissors and sending them off this week to my dear little sister so she can be a fringe bow makin fool too!
I made these 3 bows last night in no time - really it takes just a few minutes and its almost foolproof. I used the recommended hot glue and it's been a while since I've glue gunned (translation: a few burned fingers... ) but once I made the first one I was on a roll. Now I need to wrap up some goodies I'm mailing off to my daughter who is celebrating a special birthday this week :-) I'll be back with a few cards soon.
Subscribe to:
Posts (Atom)